Radarr is a program available for OSX, Windows, and Linux that is used to automatically search movies, which are then sent to a torrent or newsbin client. It’s nice to be able to have all of our movies in digital form so that we do not have to rummage through our giant stack of Blurays.
Some of Radarr’s features include:
- A calendar to see upcoming movies in theaters.
- Automatic searching to find releases you want and send it right to your download client.
- Automatic failed download handling to blacklist failed releases until another one is found that works.
Setting up Radarr is really simple once you have Docker installed. If you’re on a Synology device, this can be done by going to Package Center > Settings > Package Sources and adding https://packages.synocommunity.com/. Once that resource has been added, search the package center for Docker. Once Docker has been installed, run it and navigate to the registry tab to search for Radarr. We prefer LinuxServer’s automatic builds. Once you find the one you would like, select it and click download it.
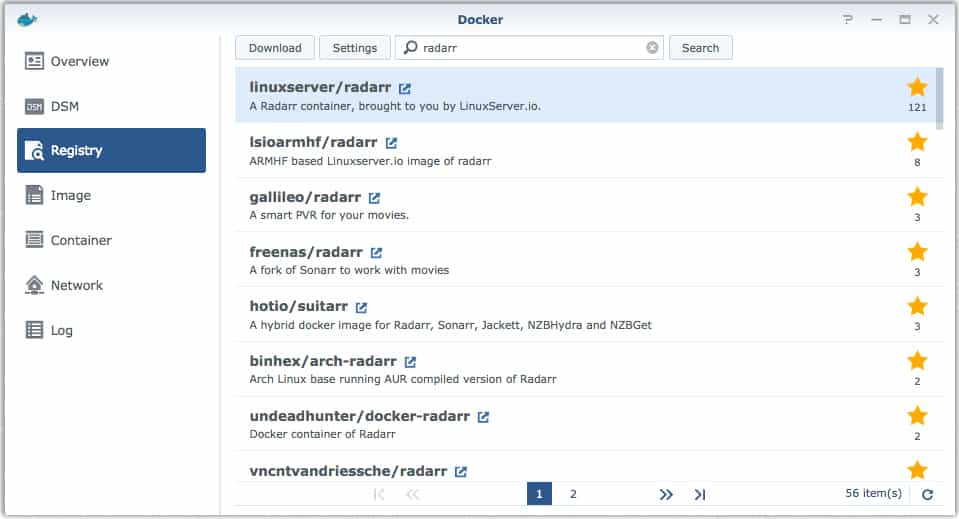
After it’s done downloading, it will move into the Image tab. Launch the container to begin configuring it.
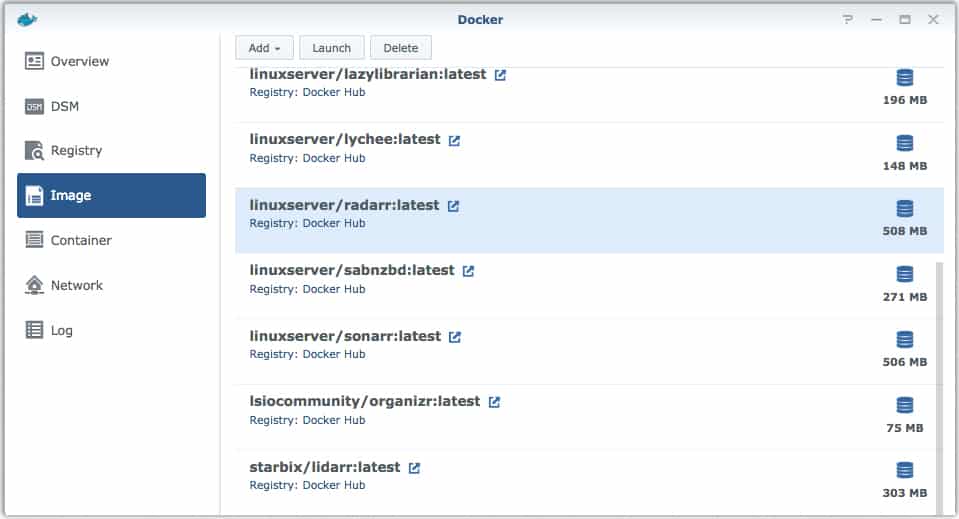
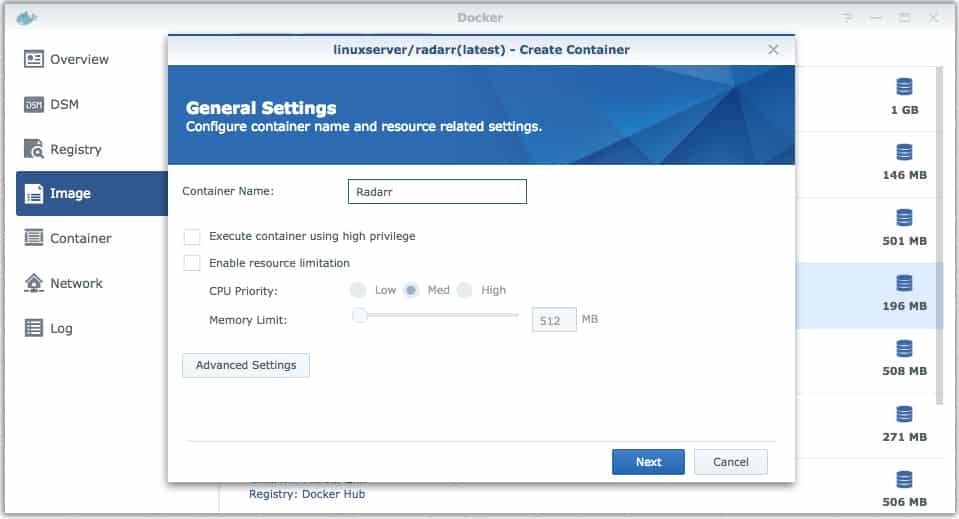
Start out by giving the container a name and then clicking Advanced Settings.
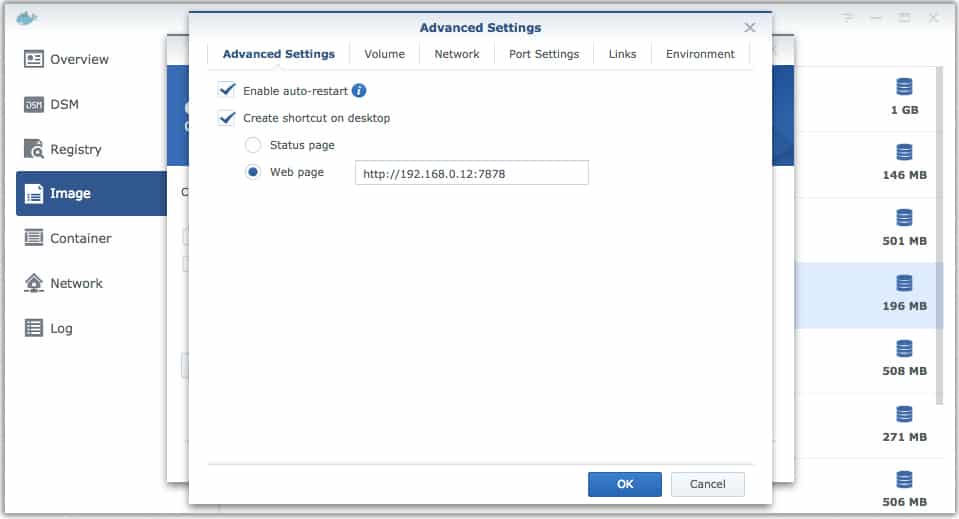
Within the Advanced Settings, enable auto-restart, and create a shortcut on desktop (if that interests you). Use your servers IP address followed by the container’s port number 7878.
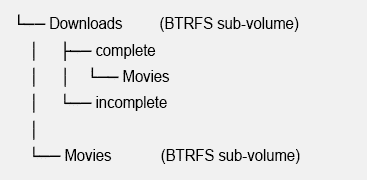
Next setup the volumes. These folders all need to be created prior to setting up the container so that they can be browsed to and mounted. It is important to setup the folders in such a way that the Download folder is a sub folder alongside the Library folder. This is so that the Usenet client can move files instantly and the torrent client can use hard links, as to not waste space while simultaneously leaving the torrent’s copy to seed in the /completed folder until X ratio is met. On a Synology, each share is a BTRFS sub-volume and acts as a different file system. Because of this, copy + move does not execute properly across the different file systems.
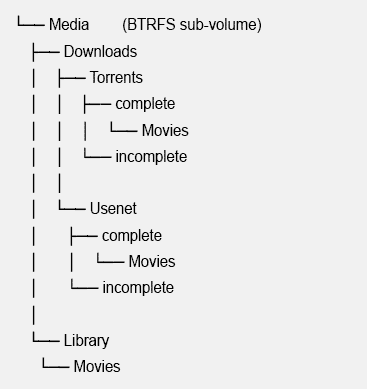
The old method used multiple BTRFS shares, and therefore multiple file systems. (DO NOT use this method)
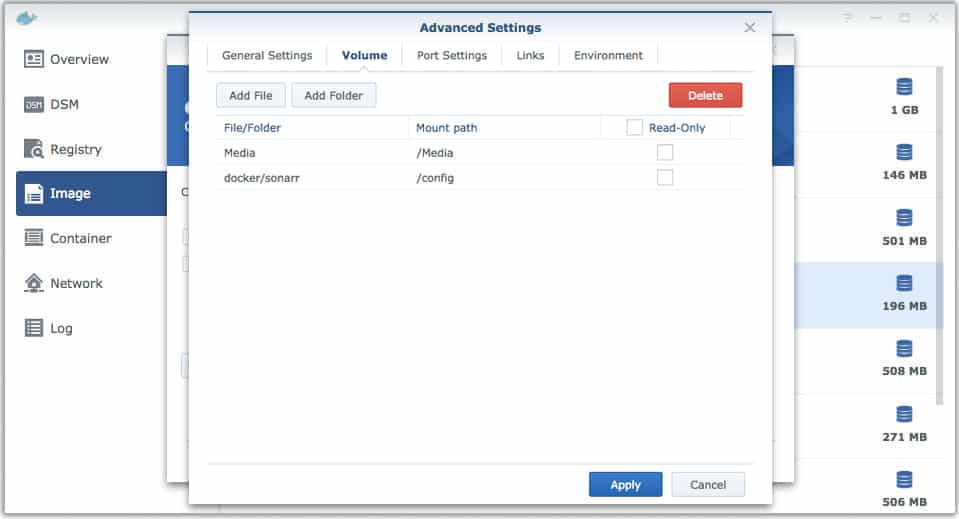
Click Add Folder to begin mounting each path. Use /config to mount the folder for Radarr’s configuration files, and /Media to mount the folder which contains the Downloads and Library sub directories. These are CASE SENSITIVE!
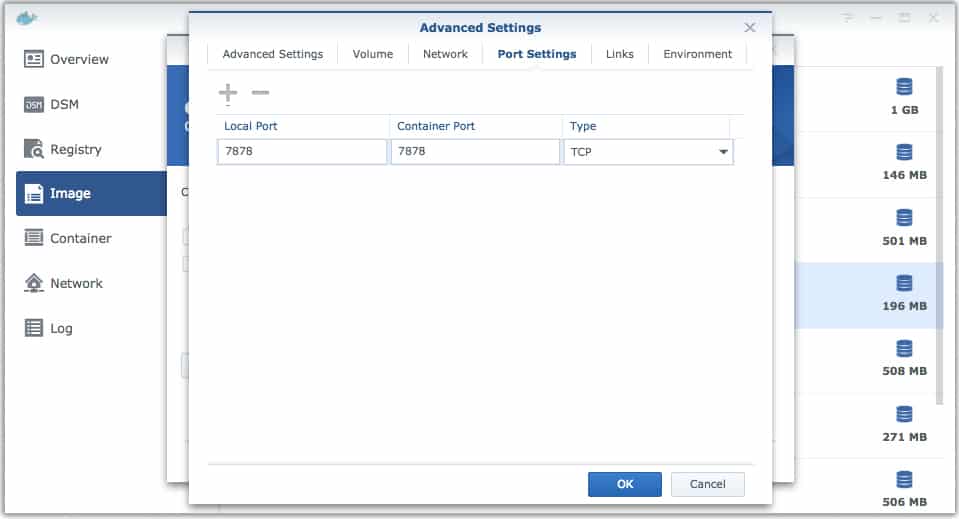
Port settings are used to open the container within a browser. This should be left to the default value since Radarr will be looking for this port. Local Port needs to be changed from Auto to the matching Container Port. If this is not done, your machine may use a random port each time and cause confusion.
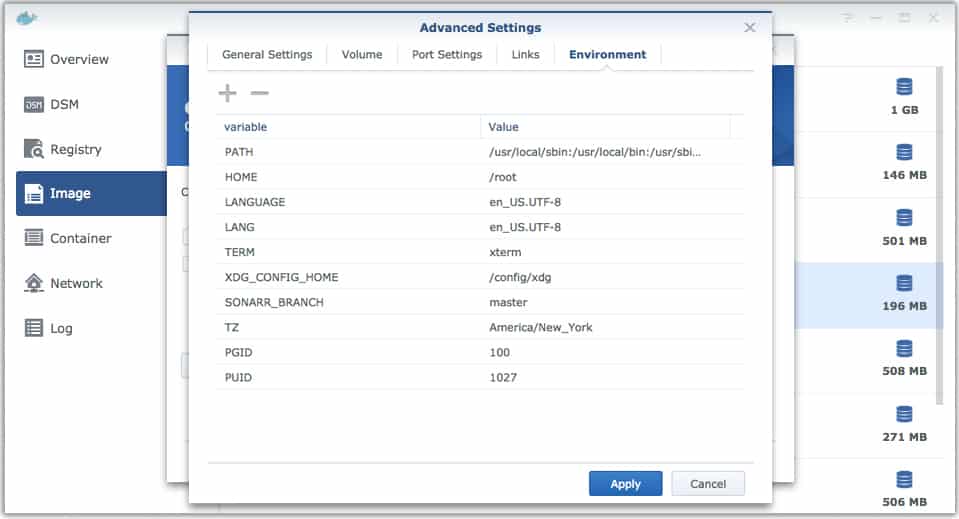
Environment is where variables are set that are needed to allow the container to run. For the container to run properly and to access and modify the directories, it must be given user permissions. It is good practice to create a new user that is used exclusively for running the container. This user needs read/write privileges to the Docker’s /config directory as well as the /Media directory. The purpose of this is so that in the event the container is compromised, the entire NAS will not be accessible. More on this can be found here.
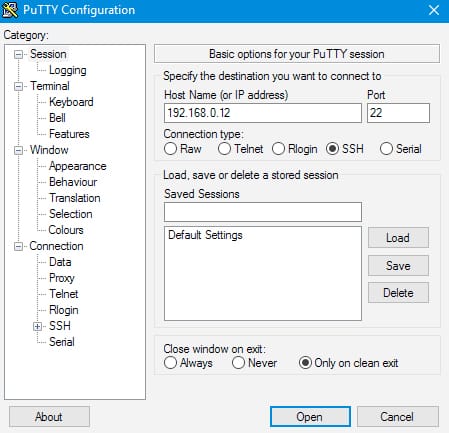
To obtain the Personal User ID (PUID) and Personal Group ID (PGID) of the user that will be running the container, use Putty or an equivalent program to SSH into your NAS.
Enter the IP address of your NAS in Putty, select the SSH radio button, and click Open.
Enter the admin login information for the NAS. You will not be able to see the password as you type it. Once logged in type id <user> to show your UID (aka PUID) and the GID (aka PGID) for the selected user. We setup a user named automation to run the containers. The command for obtaining the UID and GID in this case was id automation.

Put the IDs from the SSH session into the Environment tab as shown below. It’s also a good idea to input the local timezone, as many containers need this to run. The timezone codes can be found here.

Now that the setup is complete, click ‘ok’ and the container will launch. Read about how to configure Radarr here.




Maybe you can help i followed this Guide and it worked perfectly. about a week into it all a sudden the Bridge network could no longer see any other containers in the same bridge, this broke nzbget/ downloader etc bazarr, so radarr still kinda worked but could not download anything anymore. basically ‘host’ and ‘bridge’ no longer function, I can’t find anything on forums with a similar issues.
You shouldn’t have to do anything with the network settings.