Radarr is a program available for OSX, Windows, and Linux that is used to automatically search movies, which are then sent to a torrent or newsbin client. It’s nice to be able to have all of our movies in digital form so that we do not have to rummage through our giant stack of Blurays.
Some of Radarr’s features include:
- A calendar to see upcoming movies in theaters.
- Automatic searching to find releases you want and send it right to your download client.
- Automatic failed download handling to blacklist failed releases until another one is found that works.
Setting up Radarr is really simple. First download the copy that you would like to use and install it as you would any normal program. We use the Docker version on our Linux server and you can read about how to install that here.
Once Radarr is running it will stay open in the background and can be opened using your favorite internet browser and navigating to http://localhost:7878.

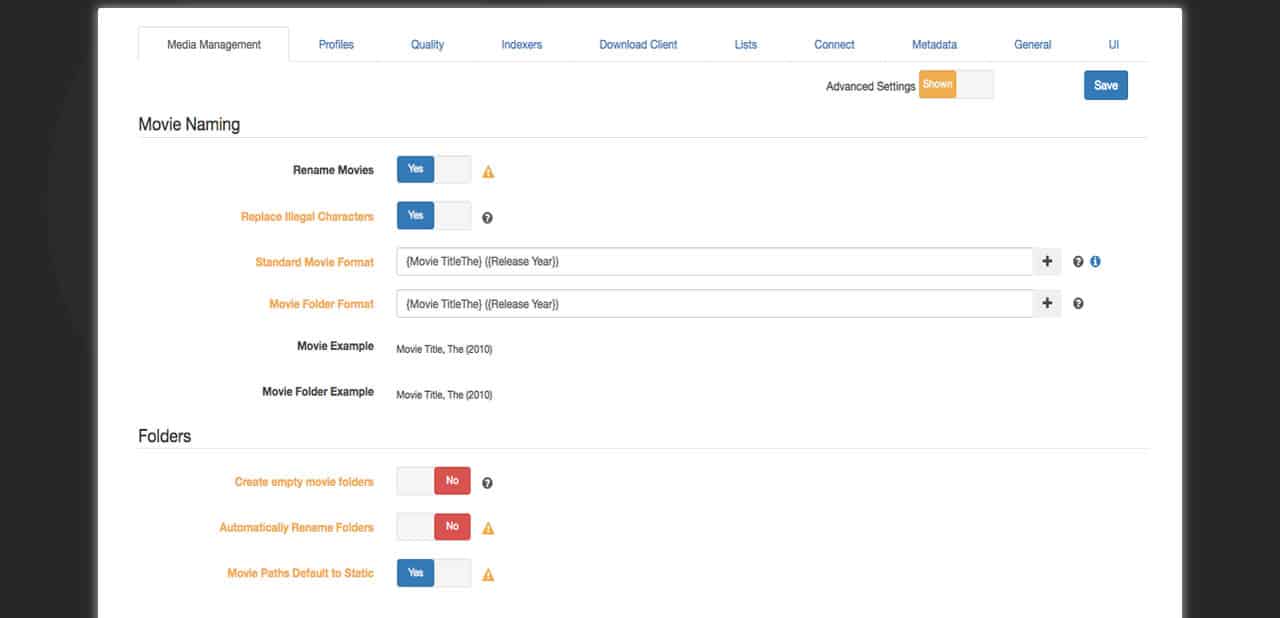
Open the Settings menu and turn on the yellow Advanced Settings tab on the right. The first tab within Settings is Media Management. Radarr has the ability to take the files it downloads and rename them according to your preferences. It is important to note that some media front ends such as Kodi need to have movies named in a specific way so that it can “find” them within your media directory. The good thing about Kodi is that it accepts several different naming conventions and it’s likely the one that you like will work just fine. Switch Movie Renaming to “Yes” and pick the naming convention you would like to use. Other than the Episode Naming section, no other settings within Media Management needs to be changed.
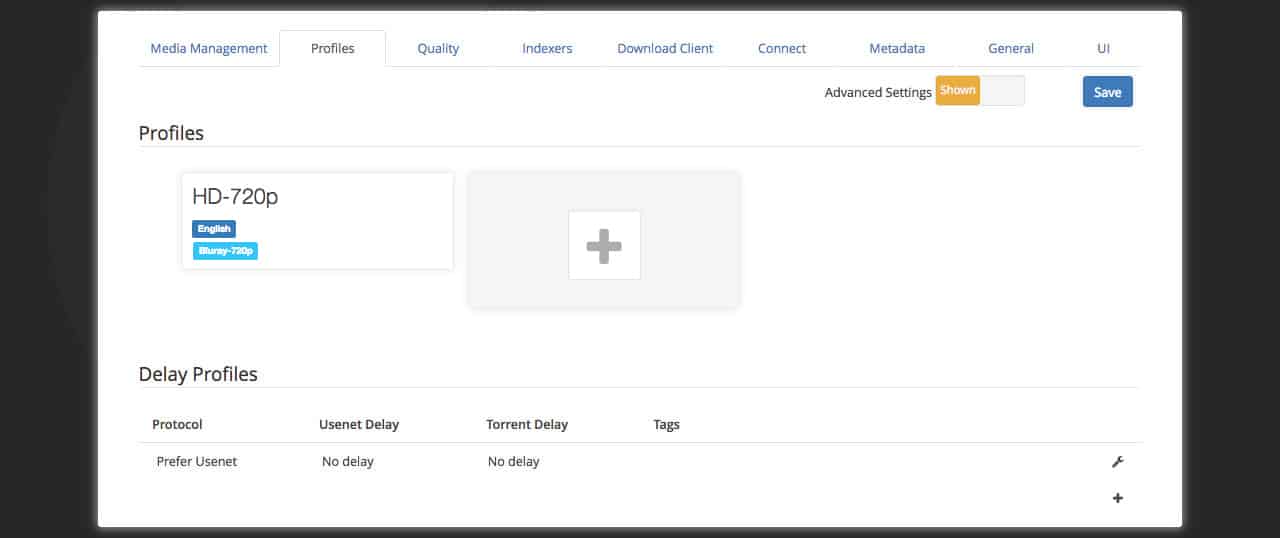
Profiles is where Radarr looks to determine what type of media to look for. Profile types include Bluray, DVD, HDTV, and SDTV, etc. We own Blurays which are 1080p, but since we will be watching our movies on a smaller television we used the 720p profile. This decision also helped us save a ton of hard drive space since 1080p movies are 10GB+ each. Under Profiles there is another section called Delay Profiles. Here you can decide whether you would like Radarr to prefer Usenet, or Torrents.
The Quality tab is next, and is used to adjust the sizes of the movies that Radarr grabs. Since we are only using just one profile setup in the previous step, we only had to adjust the settings for Bluray-720p.

Indexers are sites that allow the searching of specific “posts” that the download client can use to automatically download the movies. Radarr can search both Usenet and Torrent indexers. Usenet is not free but far superior to Torrents. Torrents are pretty straight forward and the most popular one is ummmm, ARRRRRR… you know…
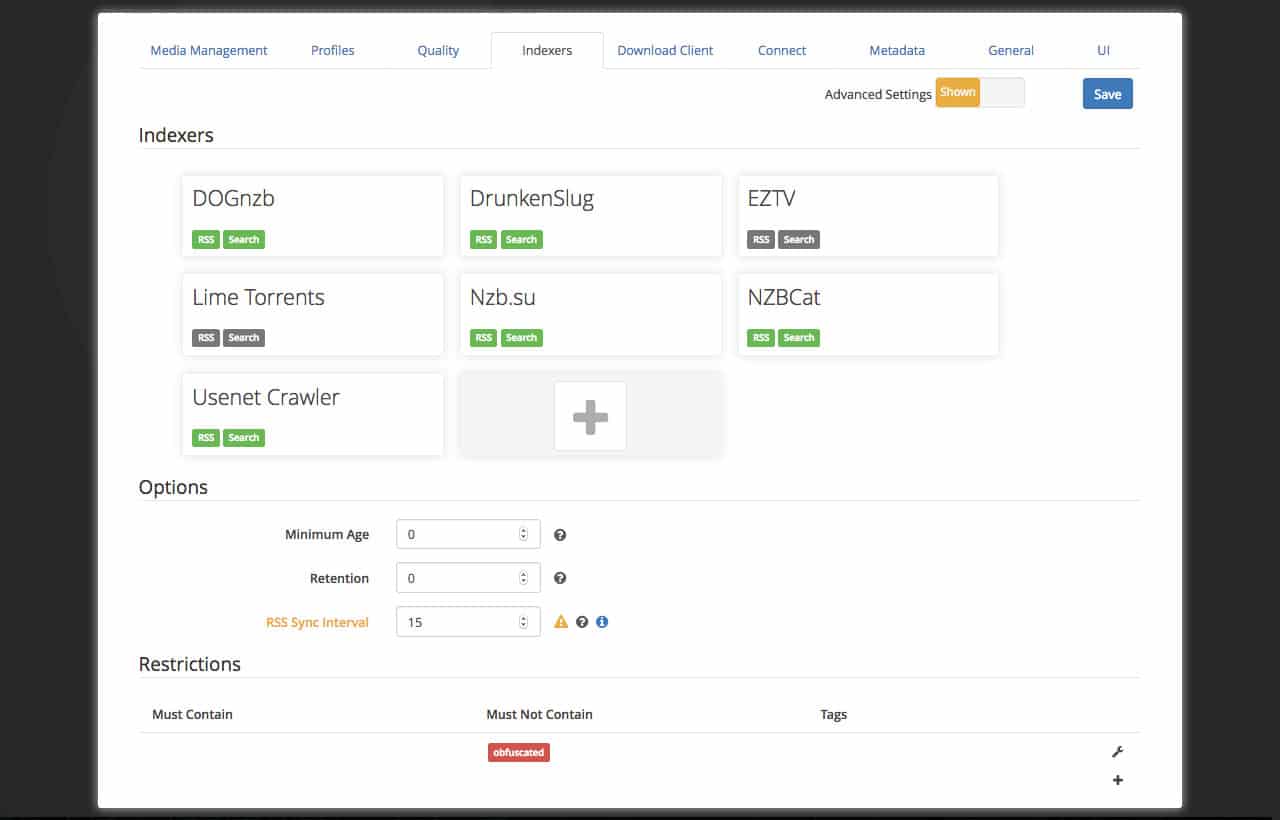
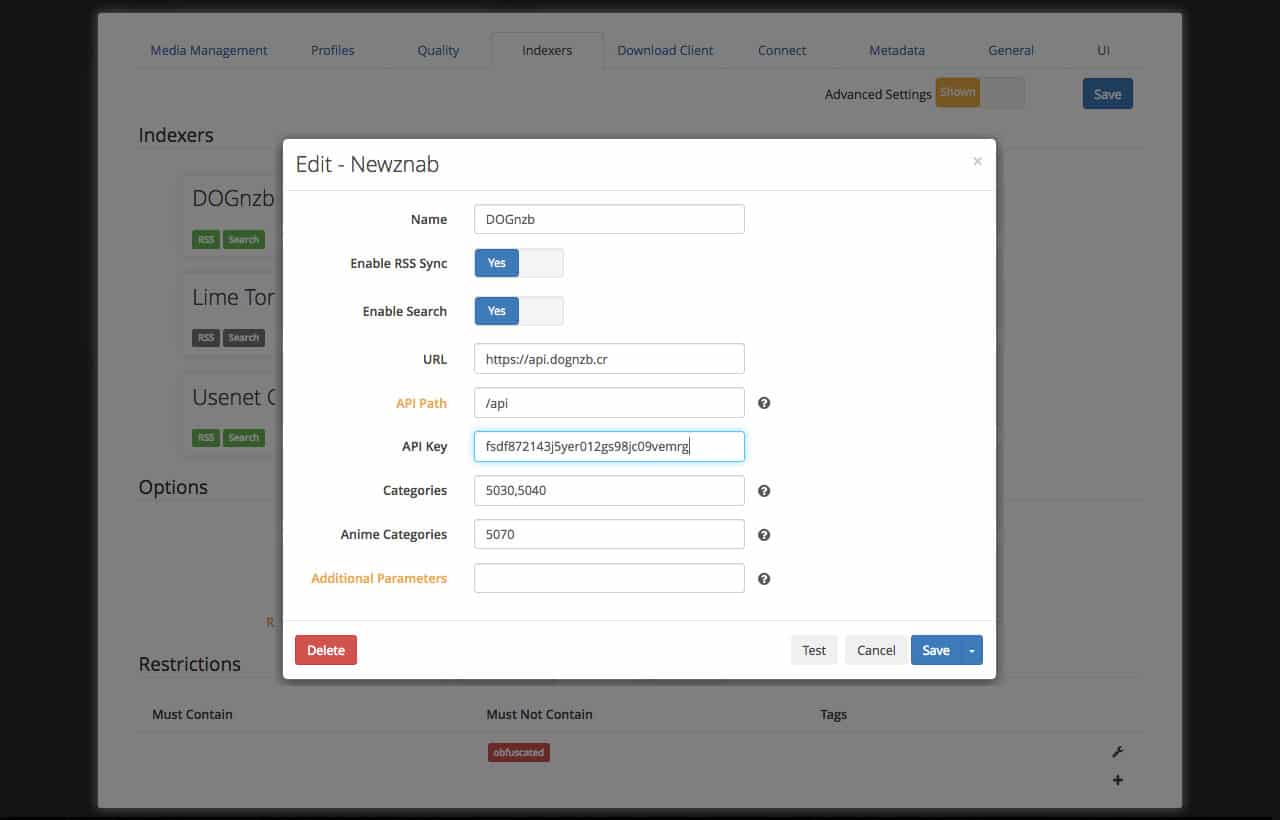
Adding providers is as easy as using the Newznab presets for Usenet, or choosing Custom if the provider is not on the list. The same is true for Torrents but they are not recommended. If you decide that you would like to go ahead and use Torrents anyway, you will need to install another program called Jackett which you can read about here.
Download Client is where the settings are input for the program(s) used to download the movies. Setting up a Usenet client and a Torrent client are the same. Click the box with the + in it and select your client and then input the port number and API key from the client chosen. SABnzbd is a really great, and simple to use program for grabbing newsbins. You can read about SAB and how to obtain the API key here.
Turn on all of the options under Complete Download Handling as well as Failed Download handling so that Radarr will delete the downloads from the history once done.
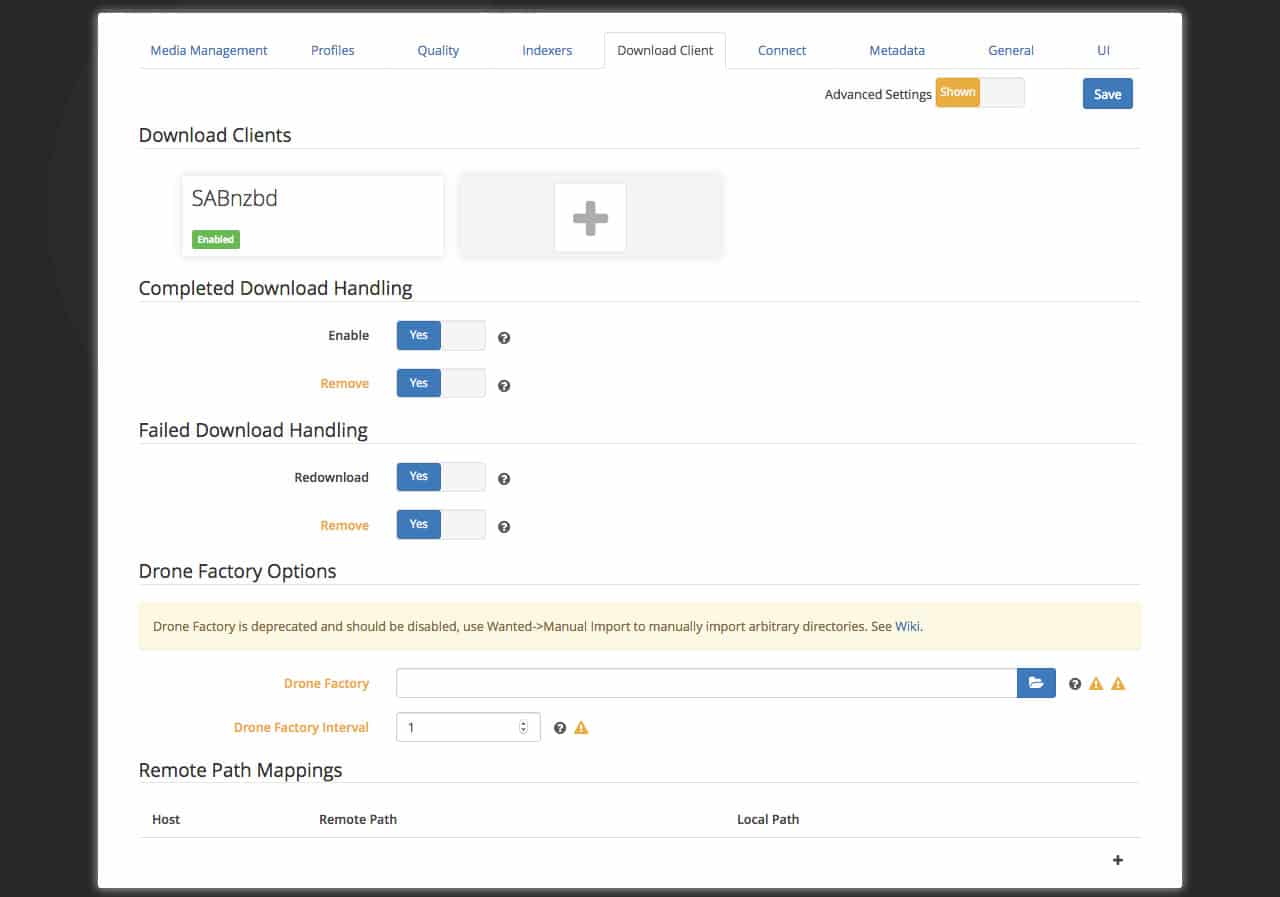
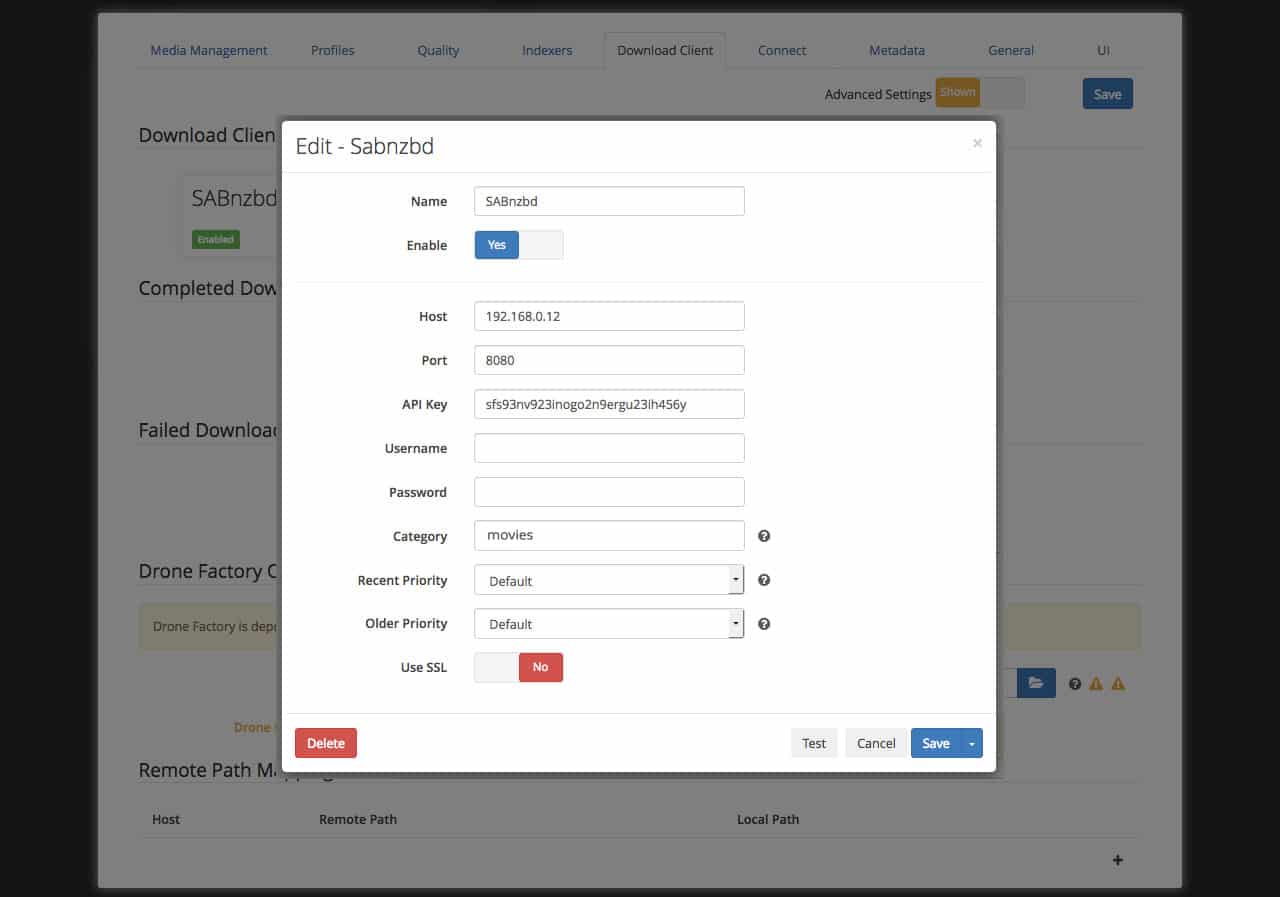
Optionally you can setup set the category under the client settings so that when Sabnzbd is done downloading the file it will be organized into the appropriate folder. If you choose to do this, you have to set the category within Sabnzbd as well as manually make the folder because Sabnzbd will not create it automatically.
Now that Radarr is setup, you can begin adding movies by clicking the Add Movies button at the top. If you chose to add movies from your IMDb or TMDb watch lists, they will begin to populate the Movies section of Radarr.

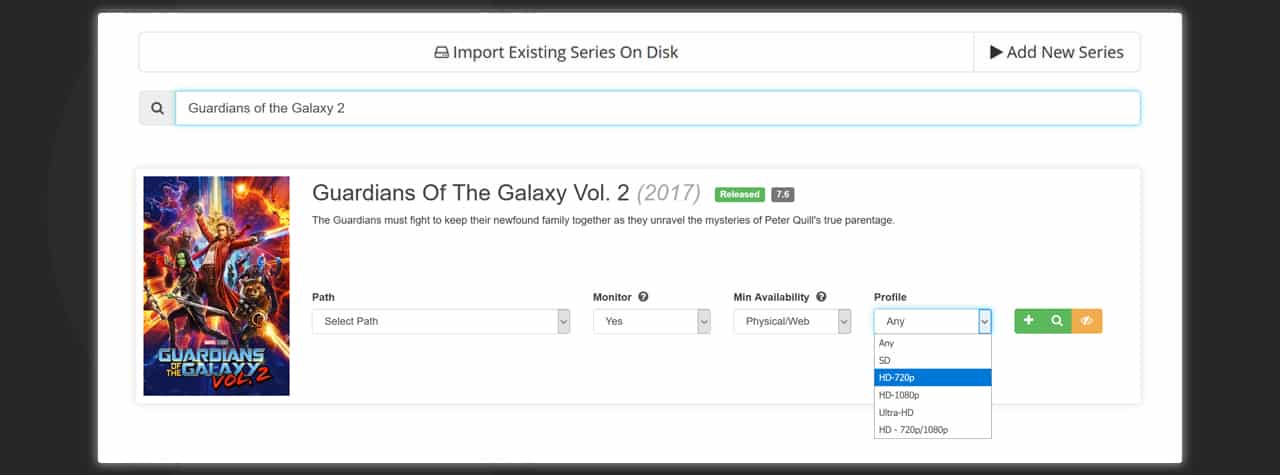
To add a movie manually, type in the name of a movie that you would like to add to your collection. In this case we will be adding Guardians of the Galaxy Vol. 2.
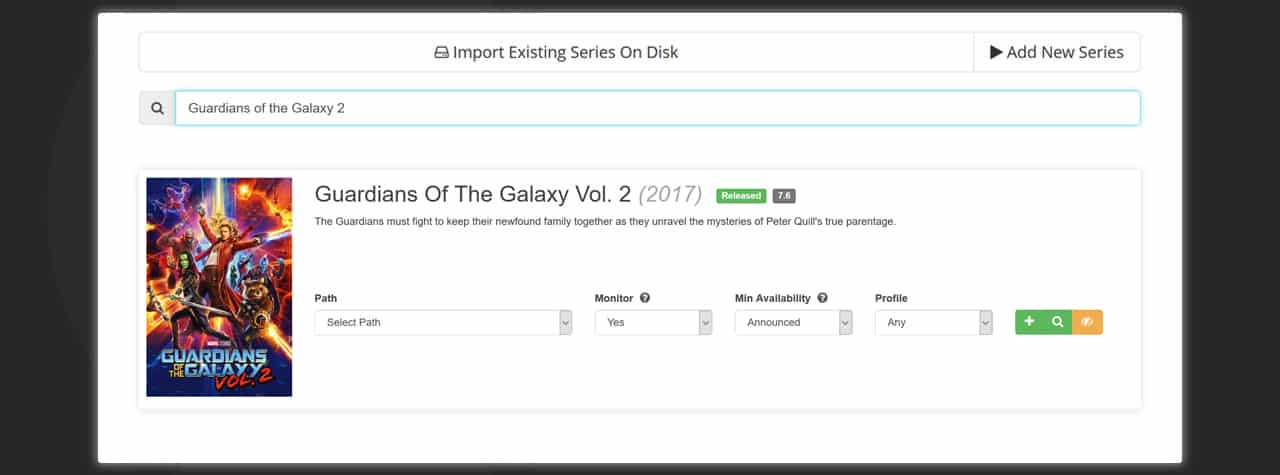
Once the movie you are looking for is found, you will need to select the Min Availability. This is used to decide whether you want camera quality (illegally filmed and a no no), or a physical copy that has been release.
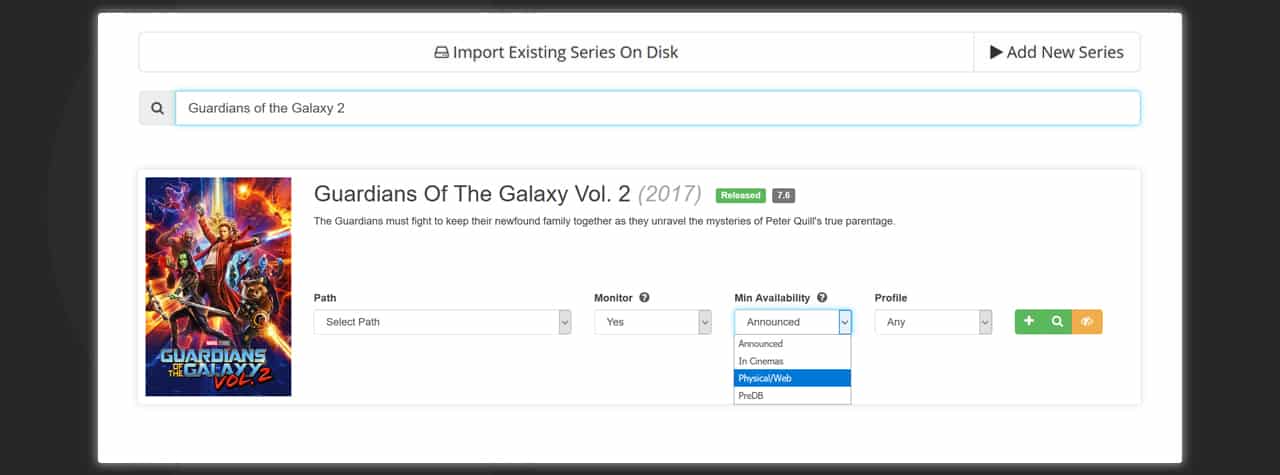
Profile was setup earlier and is use to determine the quality of the movie that you want. Choosing “Any” uses whatever profile is found first. As I previously mentioned, we own Blurays so we are using the 720p profile.
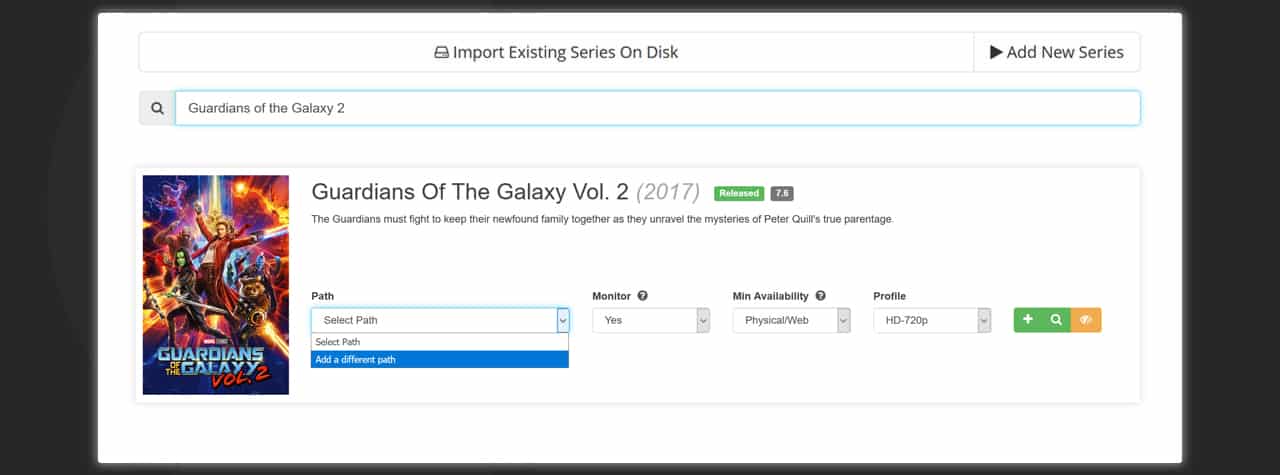
Next you will need to choose the path where the movie folders will be created. Because no paths are setup yet, choose “Add a different path.” These steps will only need to be done with the first movie that is added.
In this example we setup a folder at C:\Movies but you can use any folder that you like. If Radarr was installed as a Docker container via this tutorial, then the movie folder needs to be located at /Media/Library/Movies.
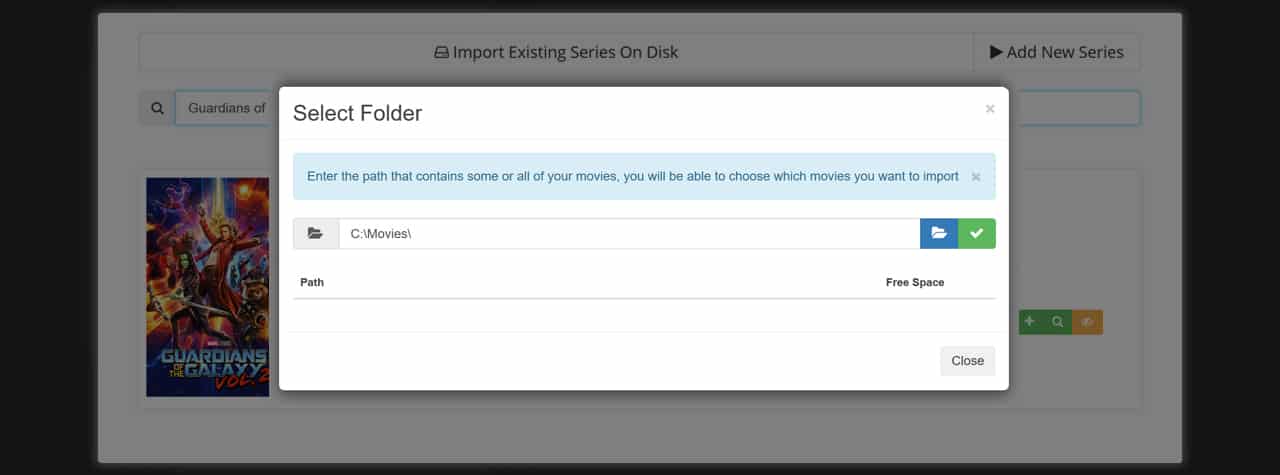
After that click the 
C:\Movies\Guardians of the Galaxy Vol. 2\
