It took us 5 times installing our subfloor before we got it right. We want to save you that trouble. We are not experts, but we feel confident in our newly learned skill. This is for people that have already taken out their original bus floor. Please do not build directly on your original floor. It’s likely rotten, the metal needs sealed, and insulation needs laid down.

Tools
| Box Cutter | Circular Saw | Saw Horses |
| Screw Driver | Hammer | Sharpie |
| Tape Measure |
Materials
| Cardboard | Duct Tape | Floor Sander |
| 6.4mm Automotive Plugs | Silicone | Gorilla Glue |
| 6-Mil Poly Sheet | DTM Marine Primer | Flex Seal |
| 2x4s | 1×2″ Furring Strips | 4×8′ 3/16″ OSB Board |
| 1″ Foam Board Insulation | Reflectix Foil Tape | Reflectix 4′ Roll Insulation |
| 2 ¾” Teks Screws |
This is a very easy day project if you start early in the morning so that the paint has time to dry. The first thing you want to do is sand the floor. While this is not a necessary step, it will help the paint adhere and sand down any light rust that you may have.
Prep Work:
Our flooring consists of 8 layers. The layers from the bottom up are as follows:
Metal Bus Floor
DTM Marine Bonding Primer
6.4mm Automotive Plugs (can skip if you do not have track seating)
Flex Seal
6-Mil Poly Sheet
1″ Studs / 1″ Foam Board Insulation
Reflectix Foil Tape
Reflectix 4′ Roll Insulation
4×8′ 3/16″ OSB Board
We rented a floor sander for $60 a day and $10 a pad. We ended up using 8 pads and since we didn’t have the sander all day we got a slight refund on the rental. Once the floor was sanded we blew out the bus for several minutes with a leaf blower. You can use any paint you like but we went with DTM Marine Bonding Primer from Sherwin Williams for the first coat. It took .5 gallons to paint the floor. Once the paint was dry we used 6.4mm Automotive Plugs and a little silicone to act as glue and filled in all of the holes from the track seating. The plugs were hammer tight so we could paint over them right after we put them in. The next paint applied was Flex Seal. This paint was incredibly thick and we almost used the entire gallon. Lastly, we used 3 or 4 tubes of Gorilla Glue to glue down 6-mil poly sheeting (painters tarp).
The Pattern:
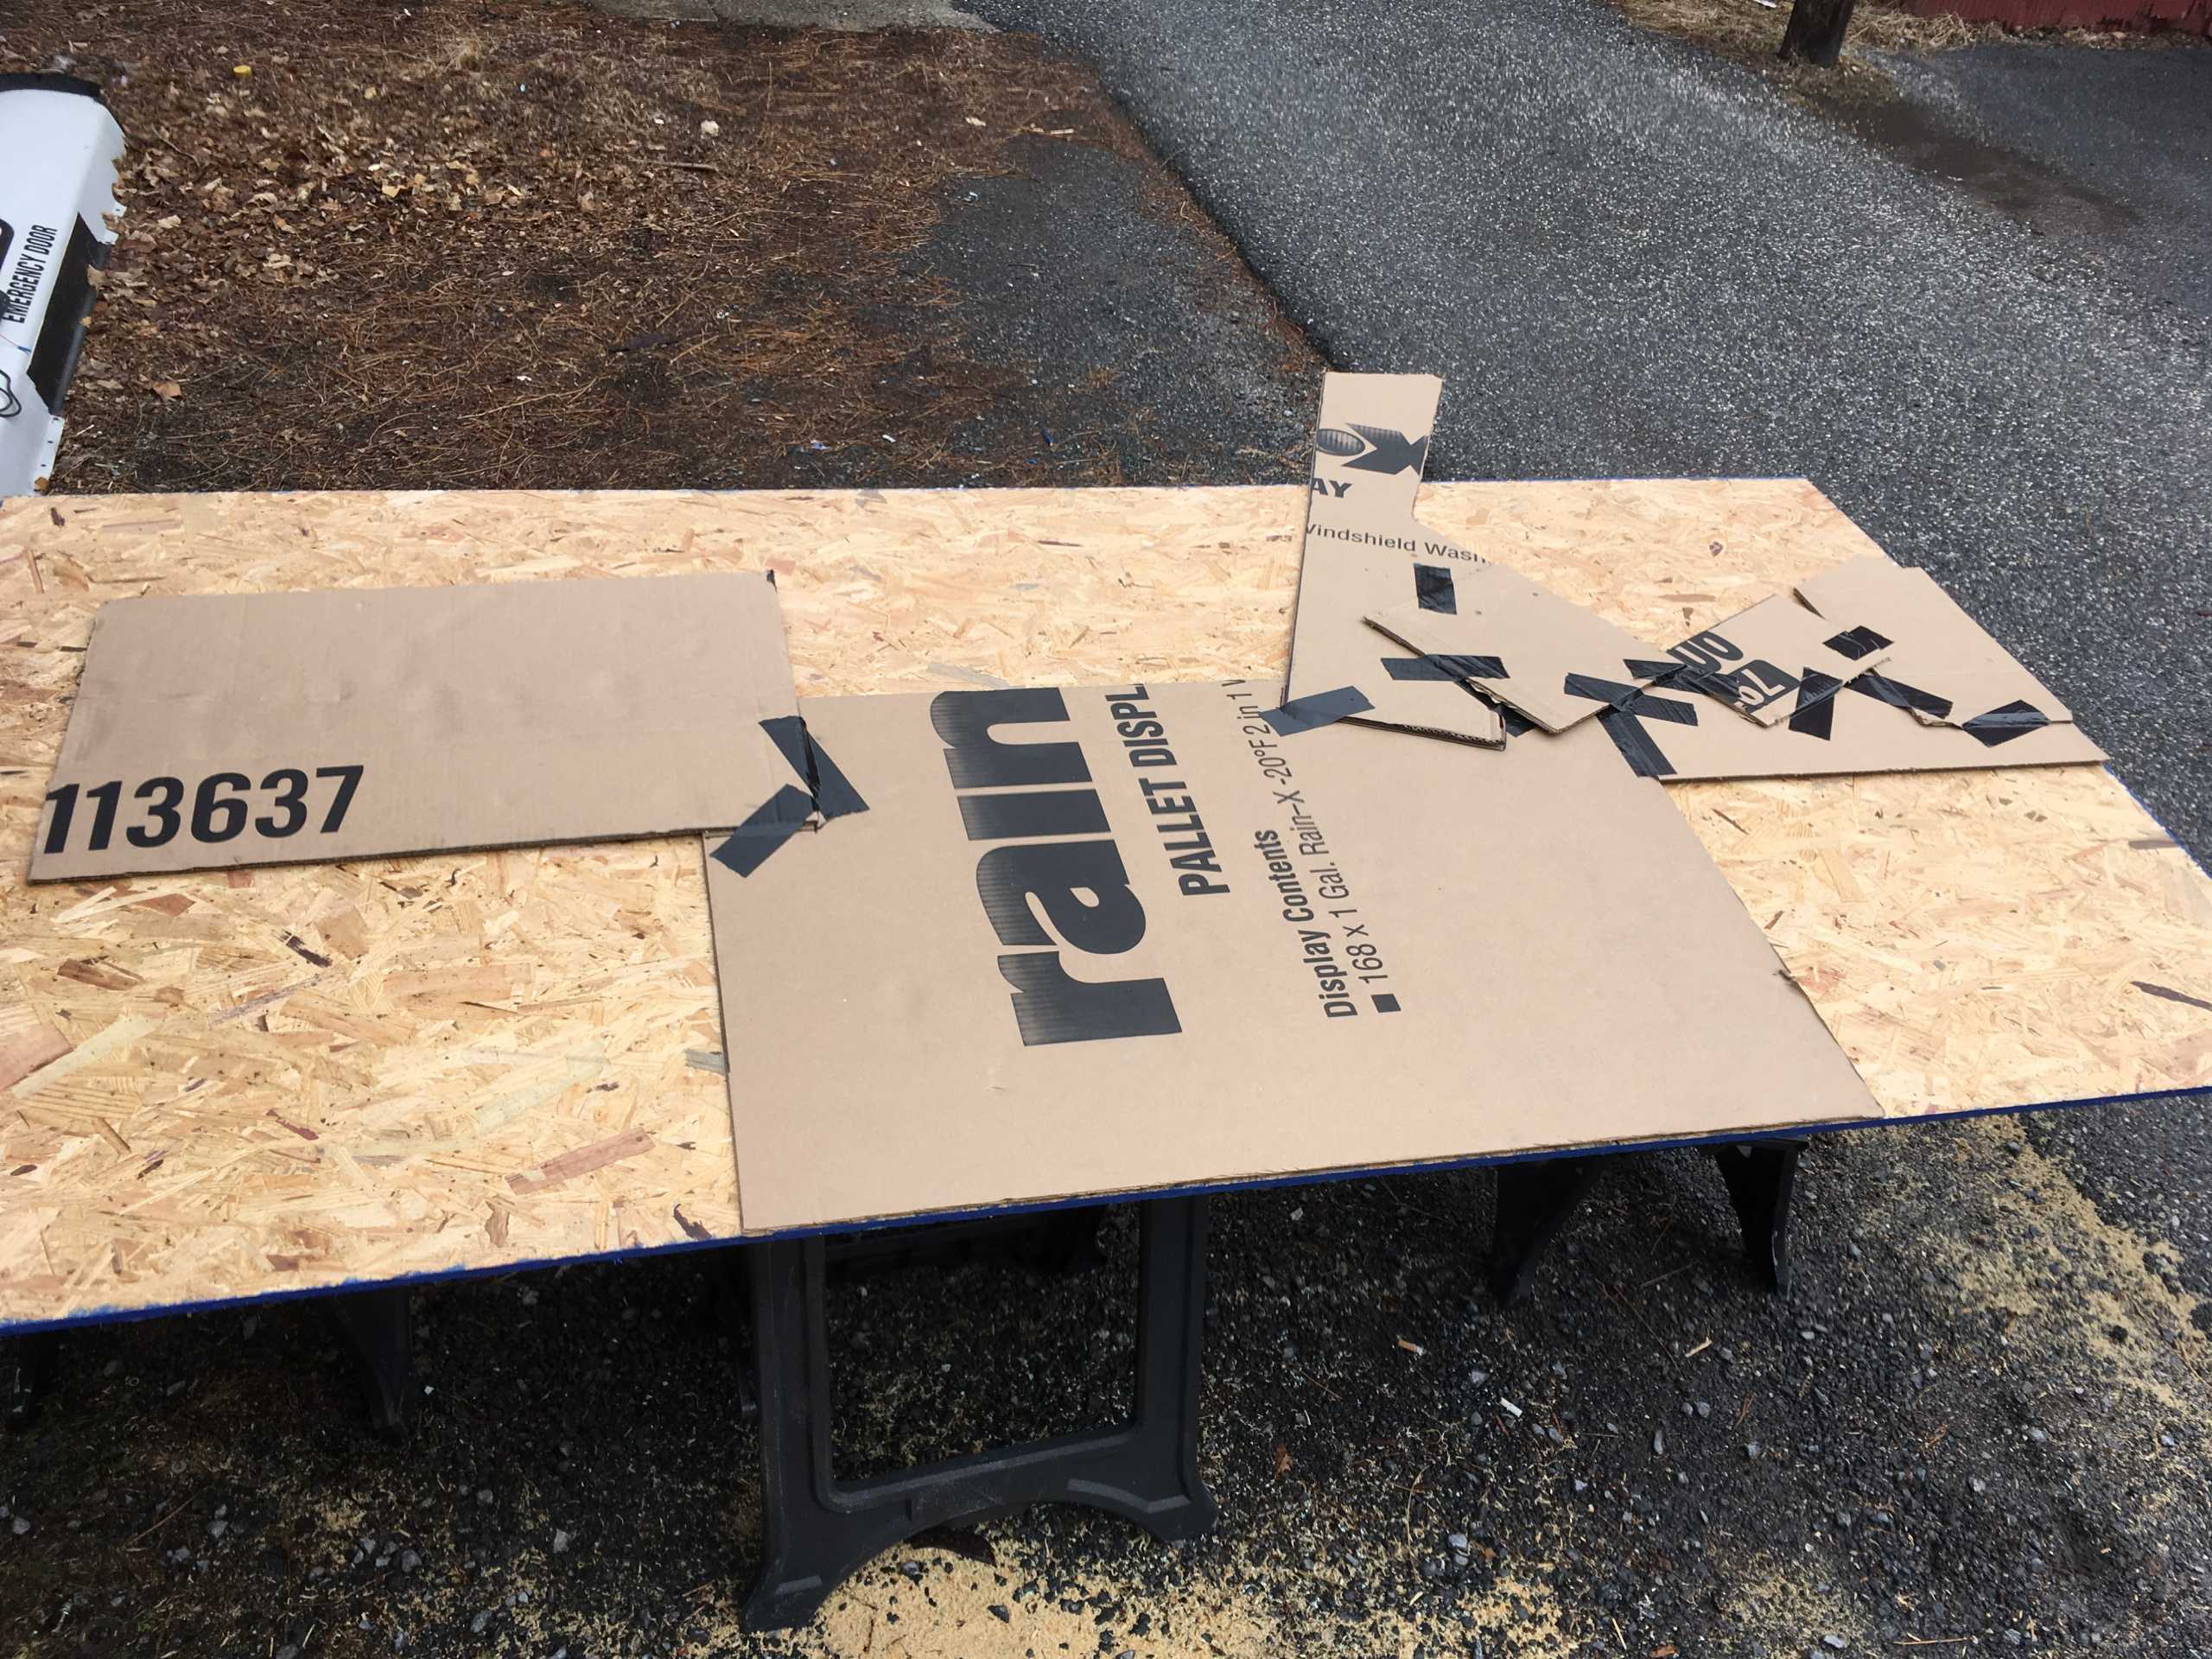
Using a bunch of cardboard scraps we taped together a pattern that fit snug around the steps, dog box, and drivers area. If you do not have a dog box, don’t worry, you can still make a pattern for around the steps and drivers area. Take the pattern and lay it down on the subflooring material you are using and trace it out. Once you have your wooden pattern traced cut it out. We used a circular saw but it was a little difficult for the smaller areas. An oscillating cutter works amazingly. You should now have a perfect fitting floor piece for the complicated area around the front of the bus. This is far easier than making a bunch of measurements and figuring out exact angles. The photo below was used for our friends bus as well as ours. You can see the wheel wells in the bottom corners, steps in the top right, and dog box in the top middle. (This will make sense shortly.)
Framing:
Using some 1×2″ furring strips frame out the steps, dog box, and driver area. Screw these in with Teks 2 ¾” Self-Tapping Phillips-Drive Exterior Wood Screws. Bring in the piece of wood you cut using the pattern and push it into place. This is an easy way to determine where the first stud should go. Since the first stud is 3.5″ wide (a 2×4), you will want to have about 1.75″ or 1 ¾” (half of the stud width) underneath the OSB board. This will ensure there is enough stud for the next board to go on. We planed down our own 2x4s to 1″ since we wanted to save some money. You can buy 1″ boards but they tend to run a bit more than 2x4s. Now that you know where your first stud will go you can use the same Tek screws to screw it tight to the floor.
Insulating:
Now you have a super awkward shape that needs filled with foam board insulation. No problem. Take out the wooden pattern and score the foam board with a box cutter. Once you have it scored, use A NEW BLADE to cut out the pattern. This stuff cuts extremely well once scored. The blade will stay straight in the score track but you must must must use a fresh blade otherwise it will get hung up and start ripping. The photo below is from our bus and does not include the wheel well cut outs since we flattened our floor.
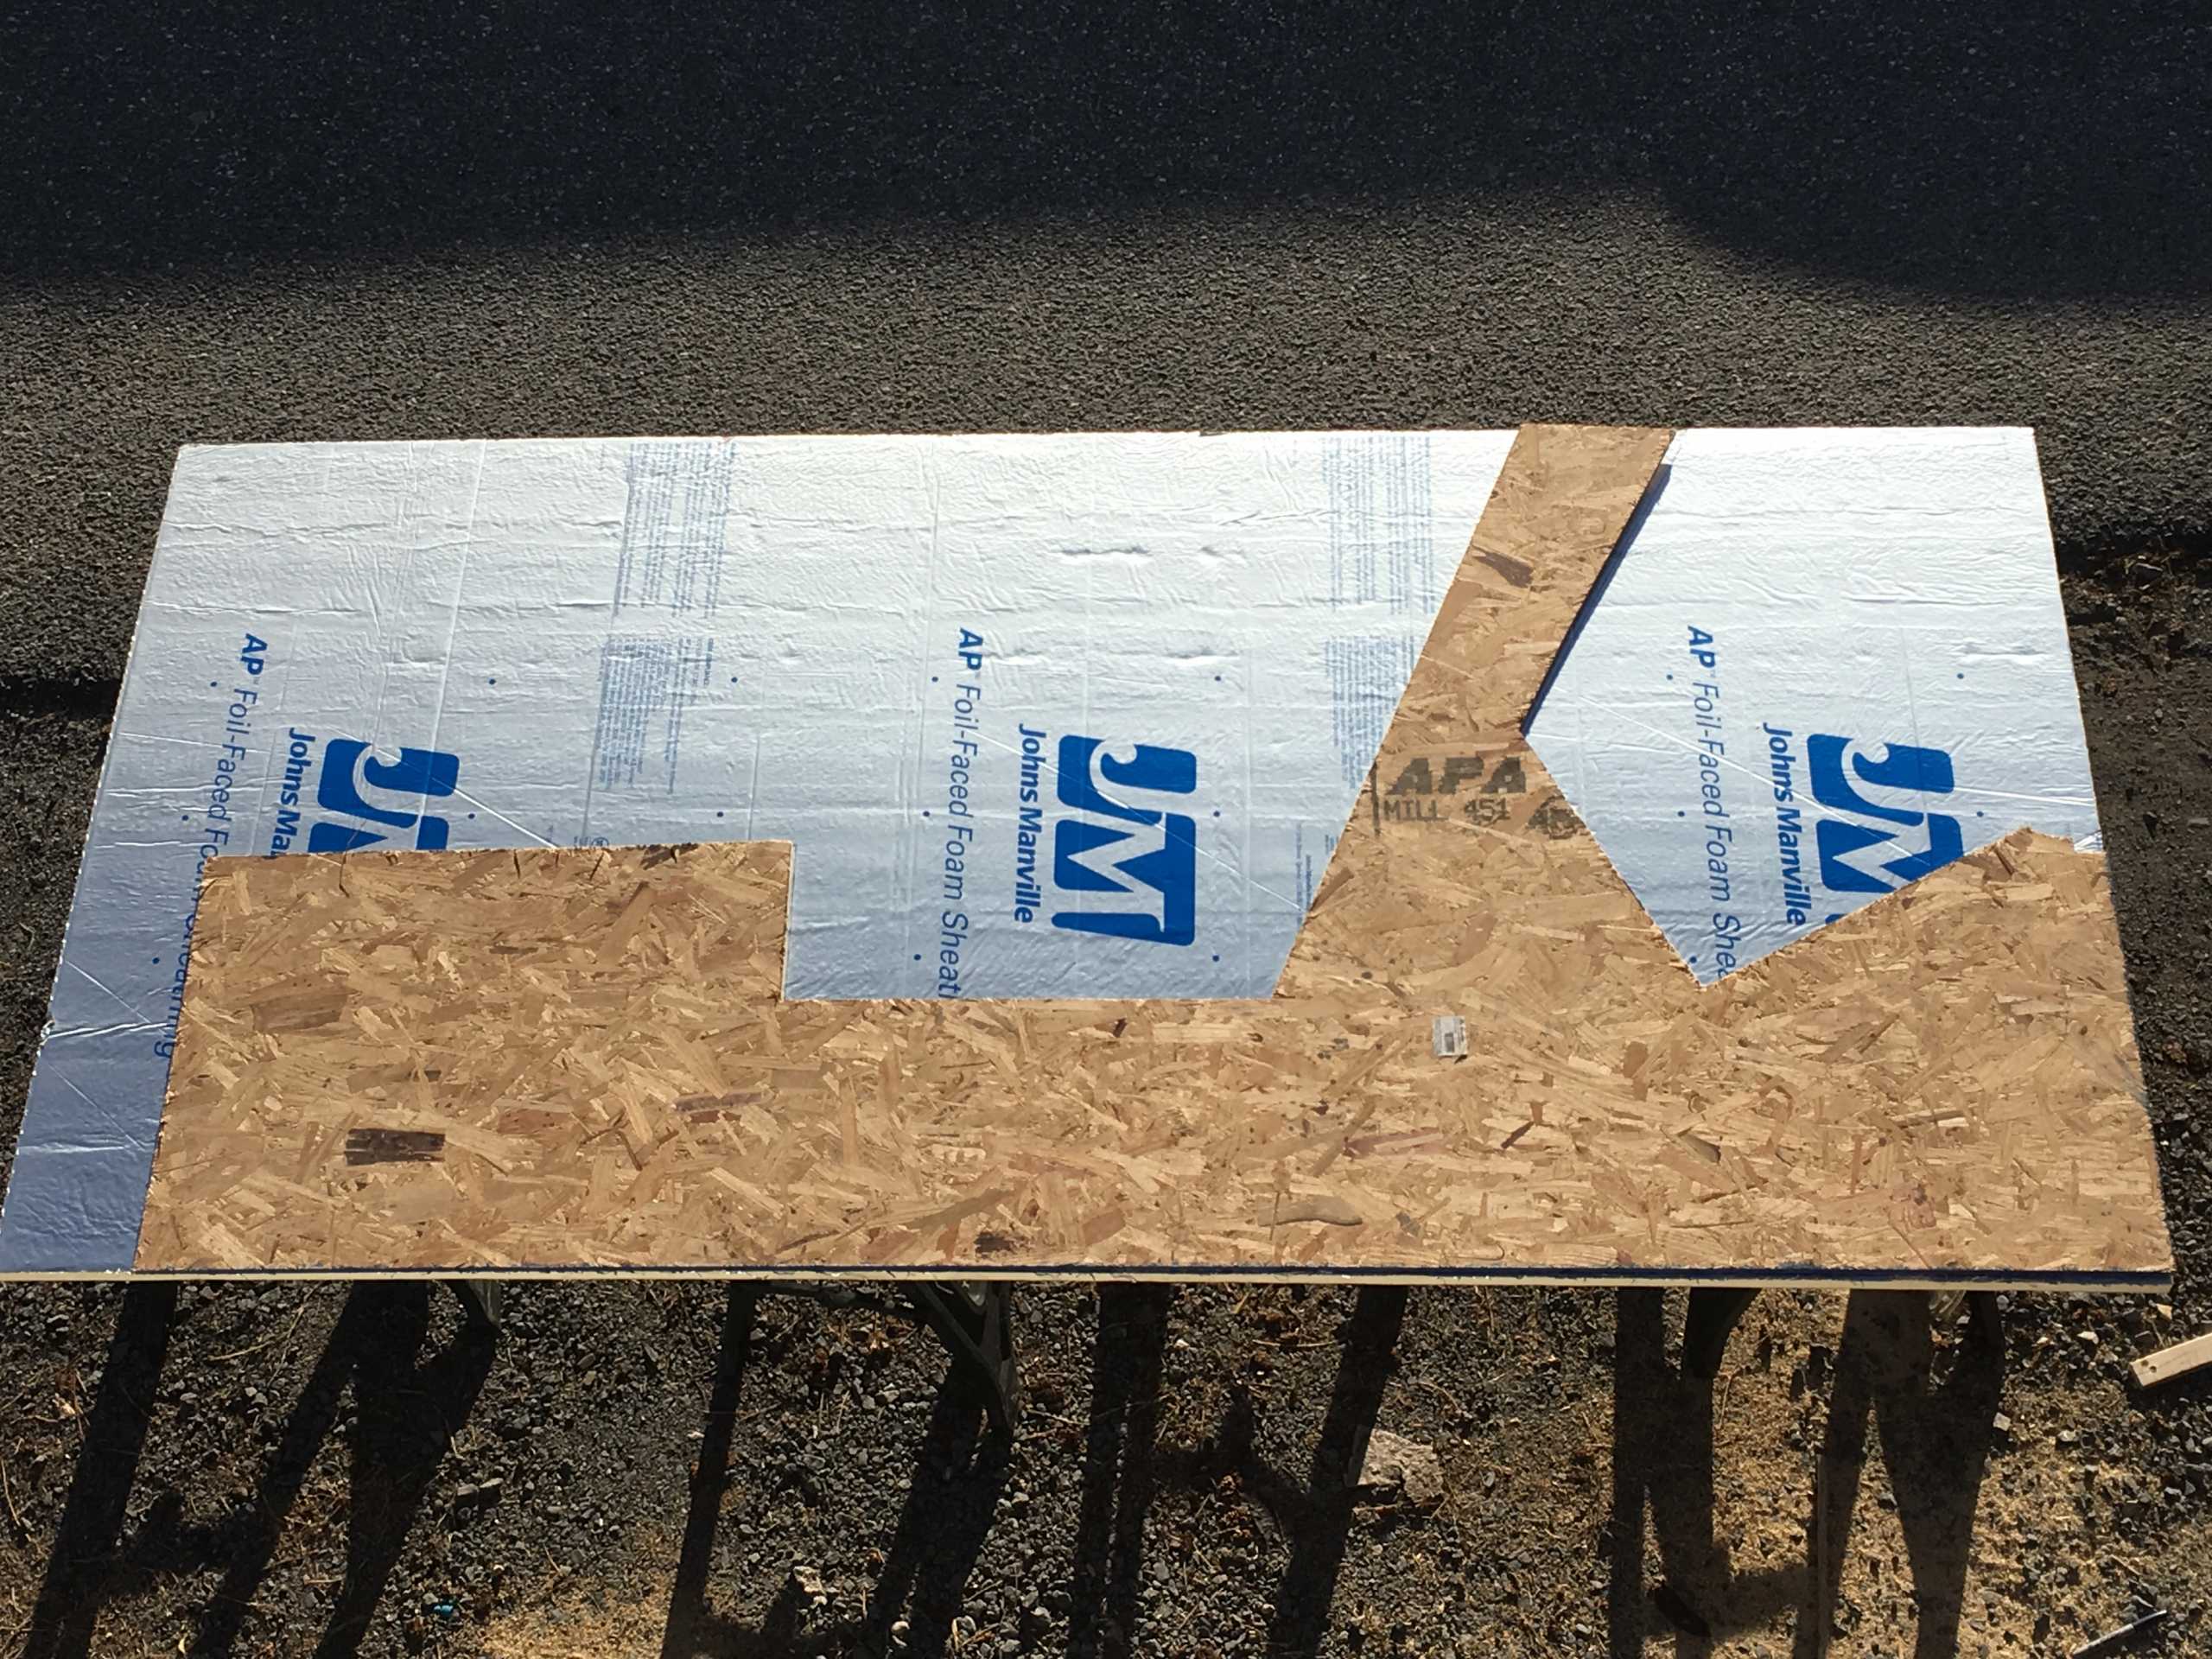
Once the foam board pattern is cut, it will be too big because it includes the front framing and first stud. To easily correct this you want to take a scrap piece of the 1×2″ furring strip and trace out the entire front again. This will subtract the thickness of the furring strip framing from around the steps, dog box, and driver seat area. For the bottom of the foam board you will subtract the 1.75″ (1 ¾”). This will give you an exact fit for the foam so that you will have one seamless, and therefor air tight piece of insulation. Tape it all up, put back in the wooden pattern, and you’re done with the hardest part.
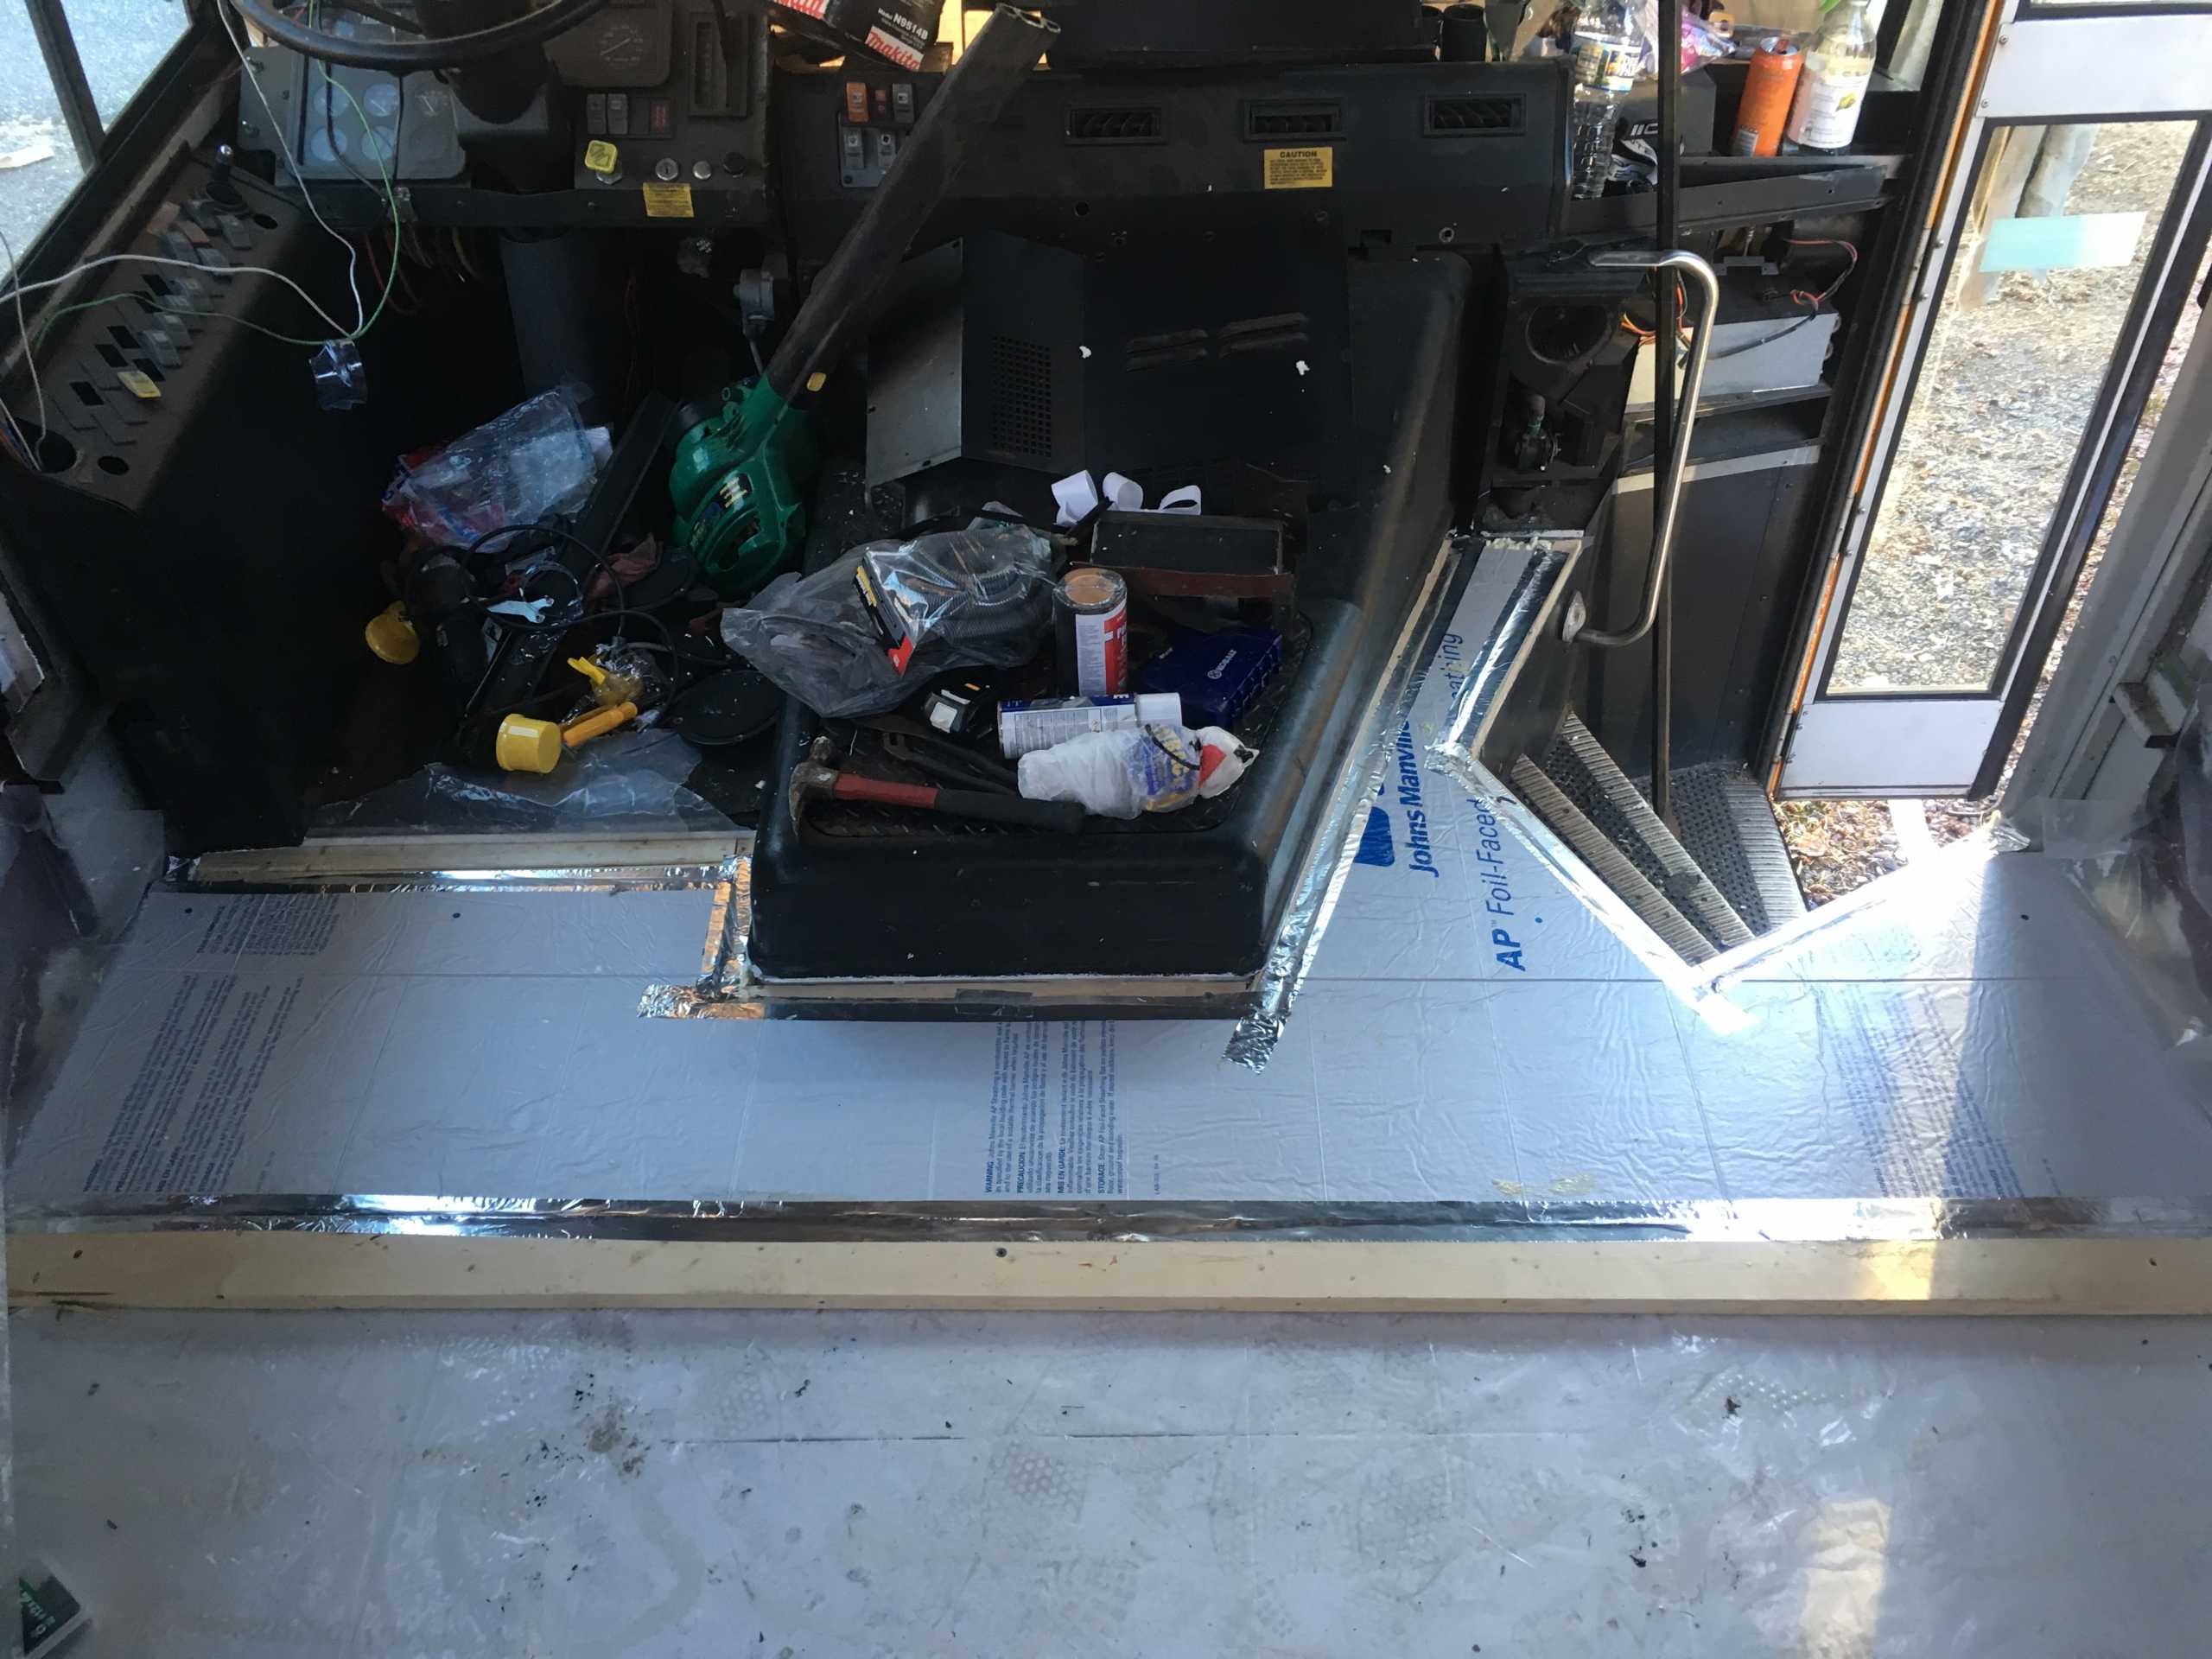
Next you want to measure 4′ from the edge of the wooden pattern (the middle of the stud) you made. Measure each end to ensure you are coming out equal distances on each side. The middle of the next stud goes at the 4′ mark. Measure and cut the next piece of foam board (Hint: It should be a rectangle) and place it in between the two studs. Do this all the way down the length of the bus.
More Framing:
Our diesel tank access hole was in the middle rear of the bus. Our fresh water tank is also going to be in this area on the inside of the bus under the bed. A gallon of water weights 8.34lbs or 3.78kg. If we were to go with a 100 gallon fresh water tank (still debating), we would have 834 pounds of water. Even half of that is a tremendous amount of weight to have on the floor. Because of this we moved the last 3 studs closer to one another at about 2.5′ apart. We also framed all 4 sides of the gas tank access hole so that we would have a nice clean hatch.
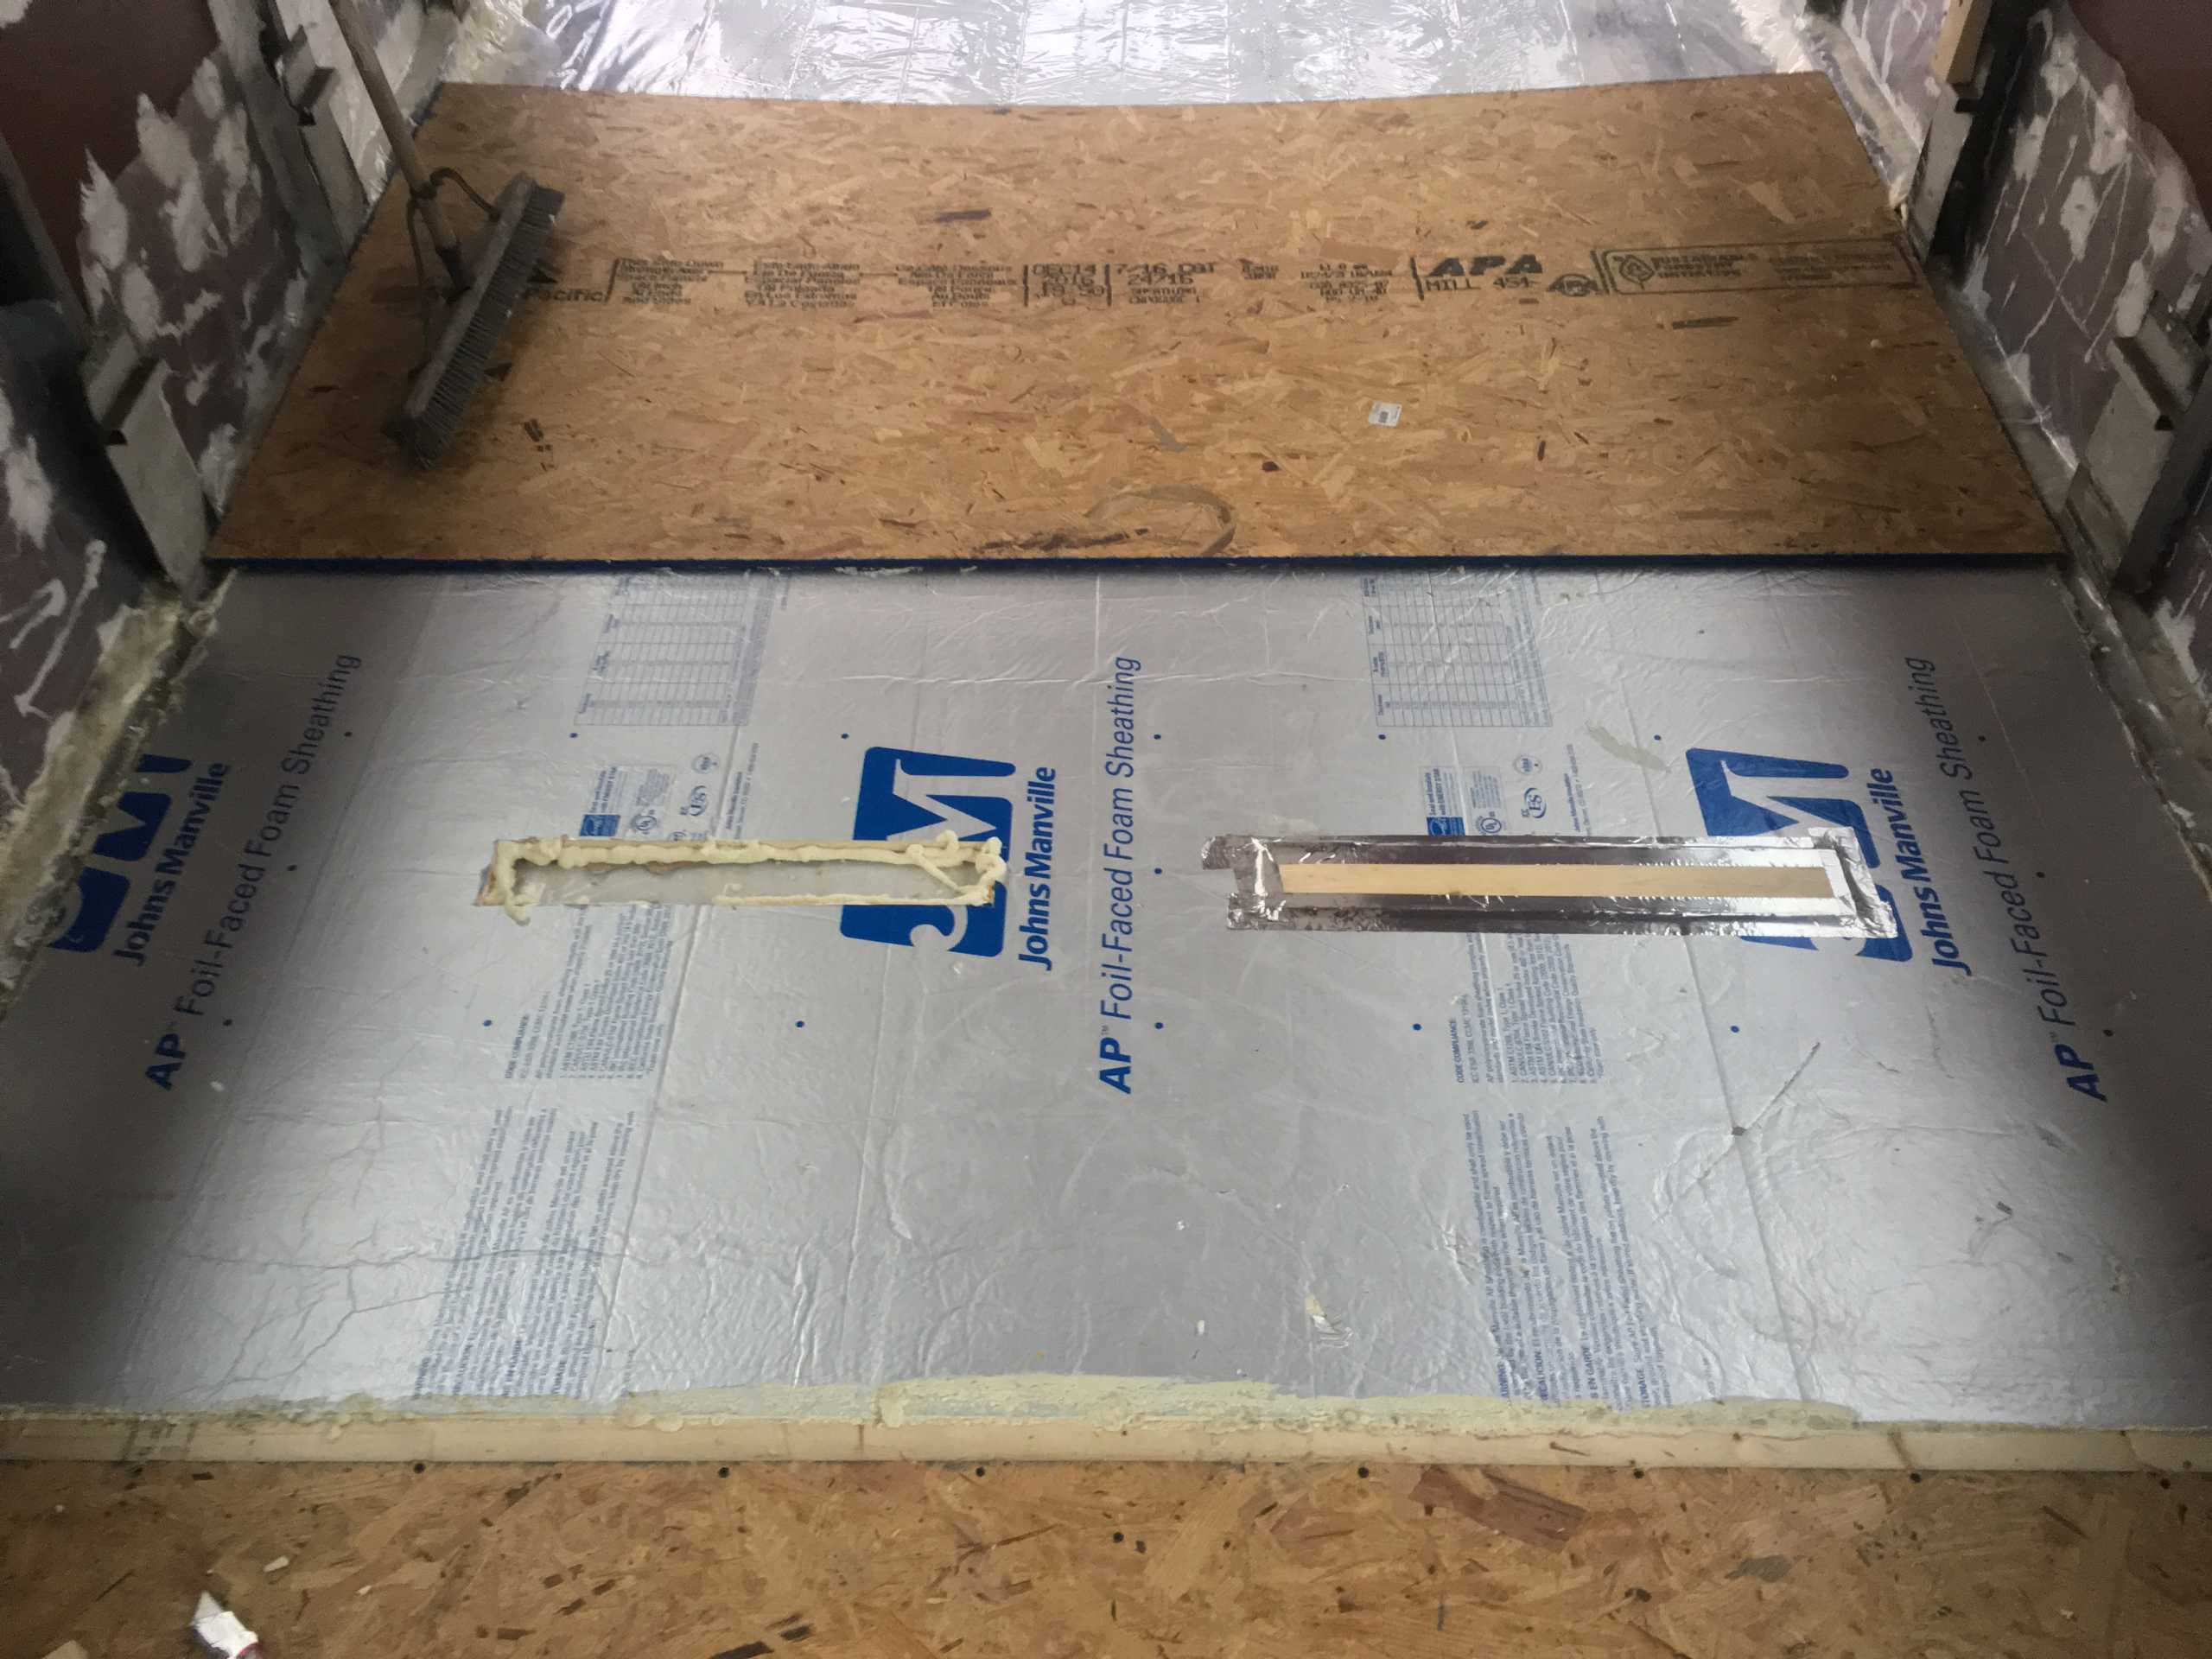
Once all of the studs and foam board insulation are installed you can beginning adding supports. Typical flooring should be 16″ centers and so far we have made 4′ centers. Quite a difference. By adding 3 vertical studs between the horizontal (window to window) studs, and two shorter horizontal studs between the new vertical studs, you will maintain a healthy amount of insulation while allowing for greater support.
To do this, place the studs down on the foam, and trace them like you did with the cardboard pattern. Cut out the foam and please, SWITCH YOUR BLADES OFTEN. To pop out the cut foam pieces, use a flat head screw driver to pry out one end. Once you have enough up to get 4 fingers under, start pulling it up. It helps to kneel on one side of the foam, while holding the other side down with your hand so that you do not damage any of the foam that is not being removed.
Finishing Up:
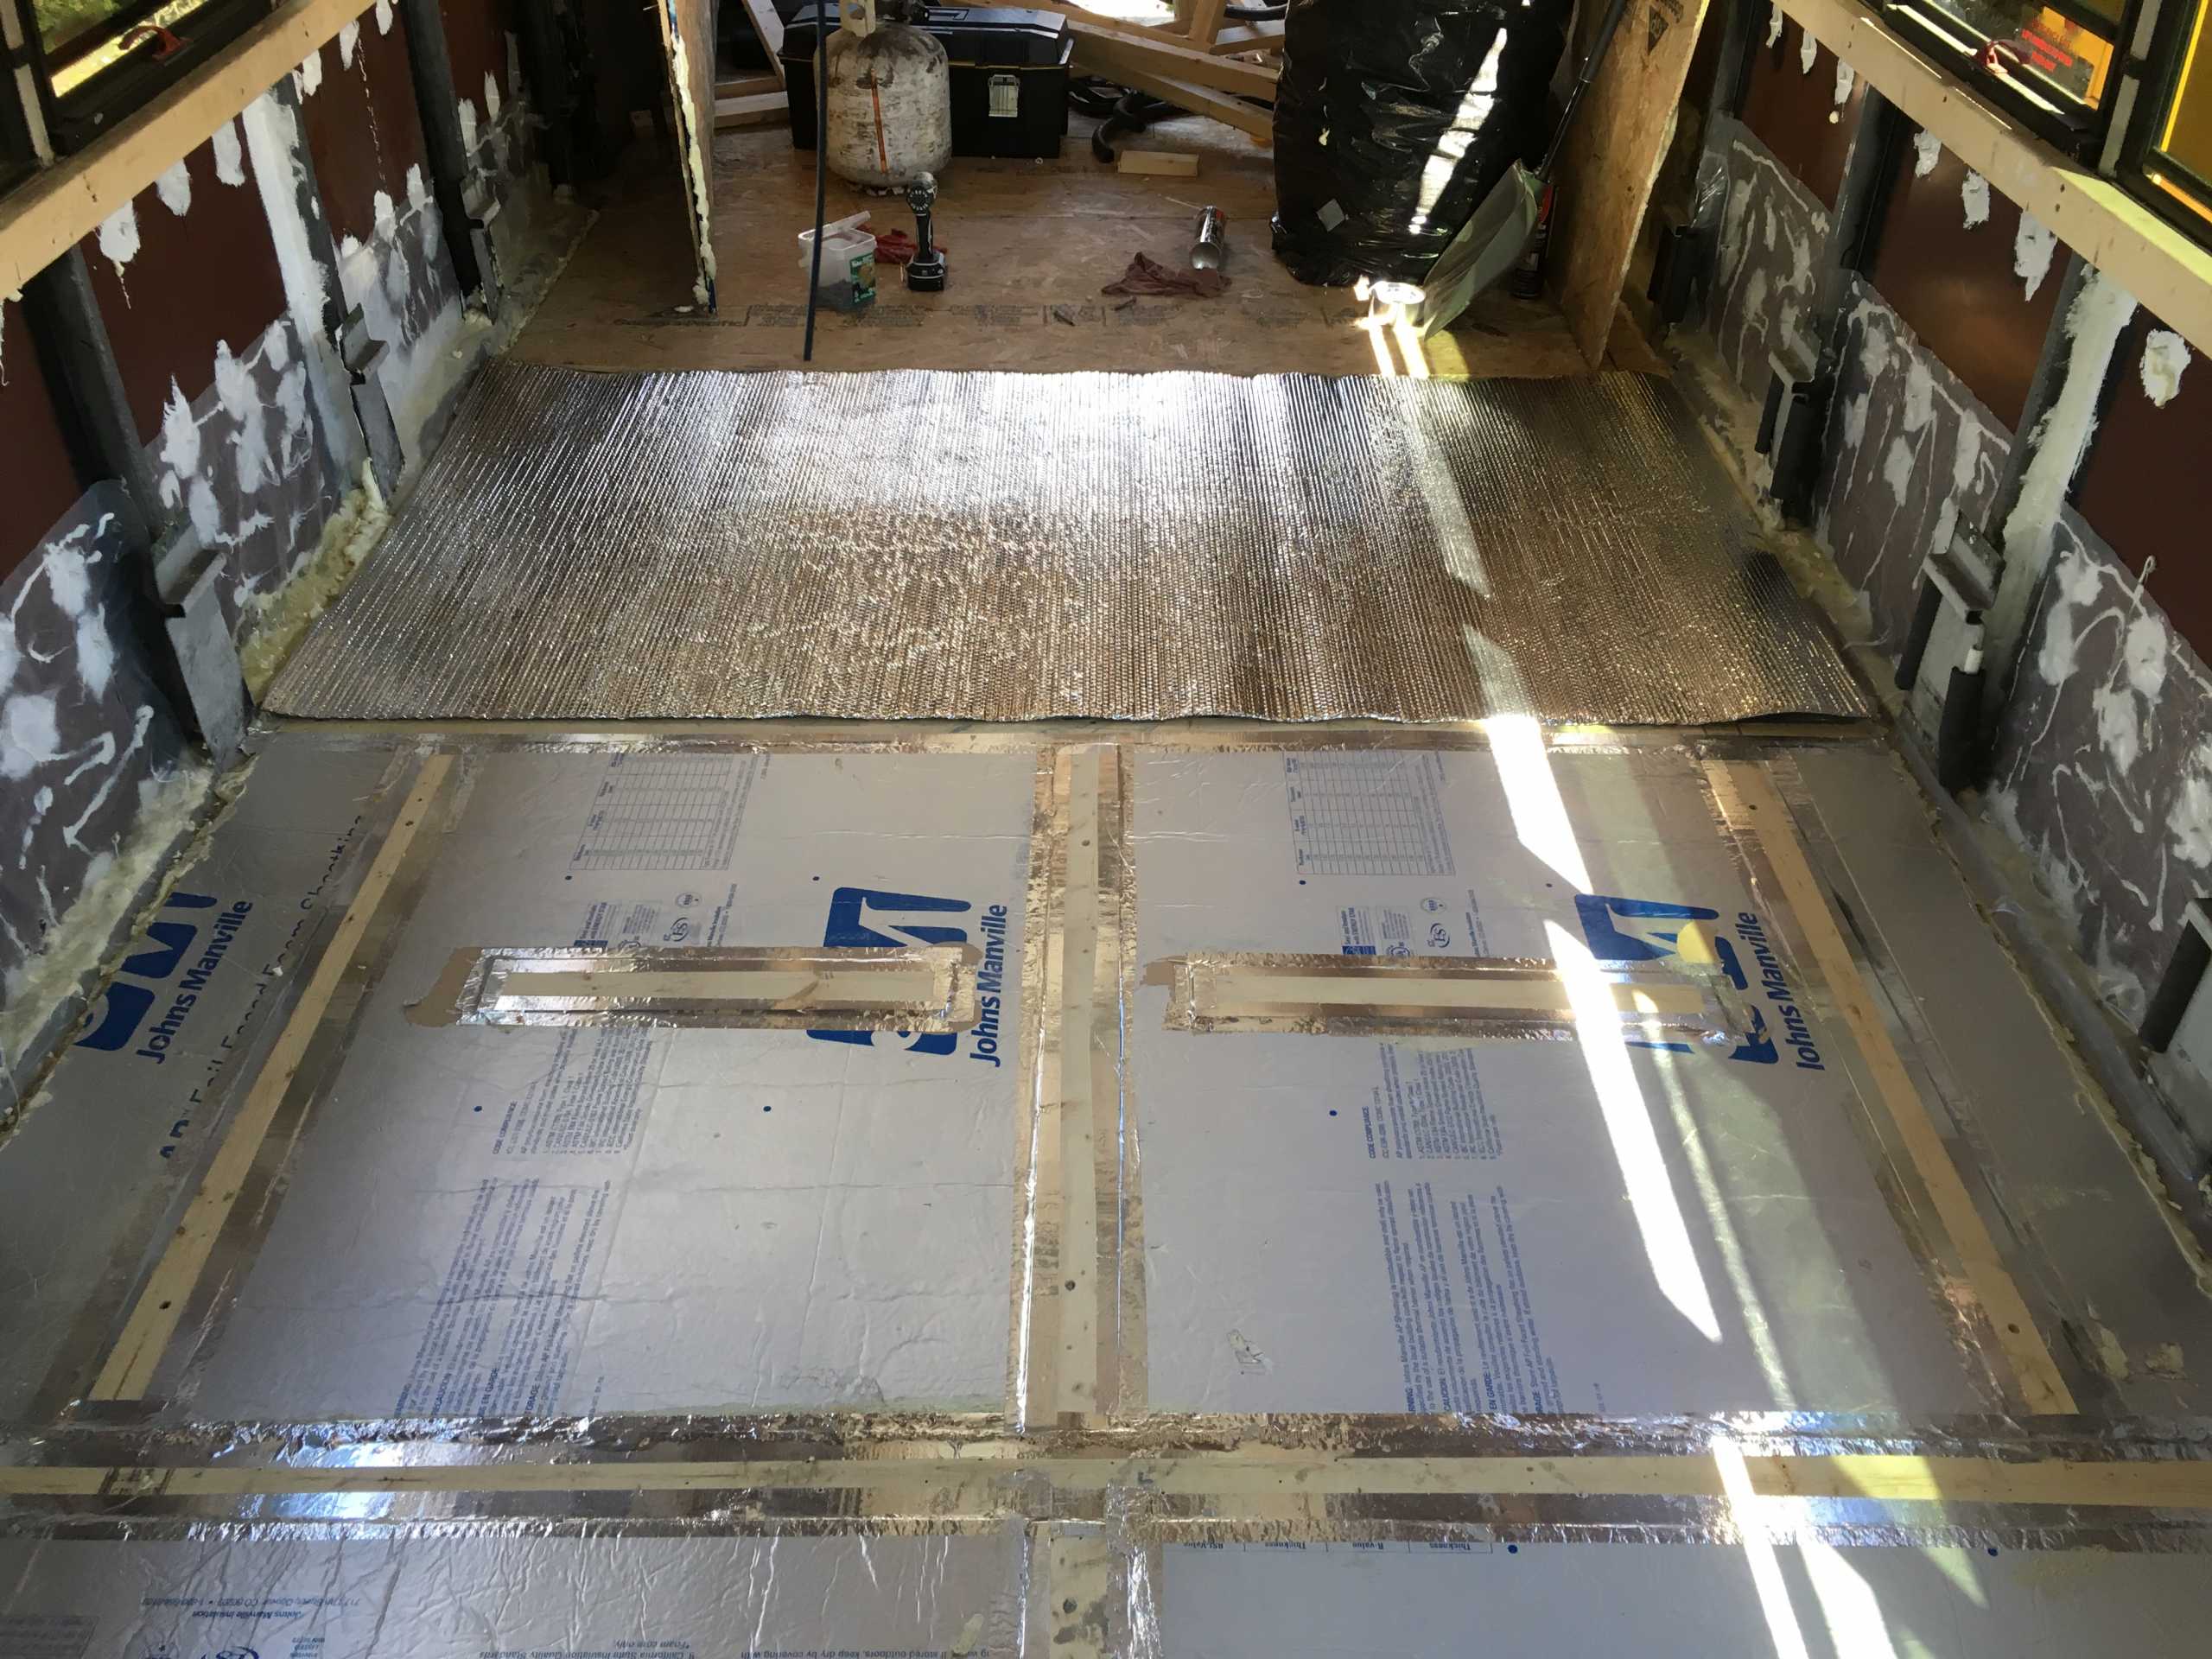
Once the foam is all cut out and the studs are placed in, you can begin to lay the rest of the OSB boards. Each main window to window stud should be home to 2 adjoining OSB boards. After all of the seams are taped with Reflectix Insulating Tape, you can add Reflectix 4′ Roll Insulation which, will help insulate the floor even more. Because the roll insulation is 4′ wide, it will fit perfectly under each OSB board.
Perhaps you do not want to spend as many Benjamins as we did and that’s ok. Rather than 2 layers of paint, go with one. Skip the tape. Skip the Reflectix insulated sheeting. We went for maximum water security, and maximum insulation. Some people in drier climates do not have the need to seal and insulate the floors as much as we did. Just remember that insulation works both ways. It helps keep cool as much as it helps keep warm.
Good luck everyone!
